Growing Transplants
Part One, Seeding
Growing transplants is a great way to ensure a garden or greenhouse full of healthy plants. When you grow your own transplants using supplemental grow lights, you can produce any number of plants that’s practical for your purposes any time of year with complete control over variety selection, timing, plant health and budget. Using soilless media like peat mixes or coco coir keeps things sterile and clean, reducing potential problems with insects or crop diseases like damping off.
[quote]If there are issues that are more prevalent in your area or garden type due to local conditions, selecting for these traits can be very worthwhile—just one more advantage of growing transplants versus buying young plants that may have been produced on the other side of the country.
[/quote]
Growing transplants versus buying them elsewhere can also be a money saver or even generate some income. For example, schools, churches and organizations can sell young plants at the start of the gardening season to raise money—and naturally, producing transplants to sell can also be a year round business for some.
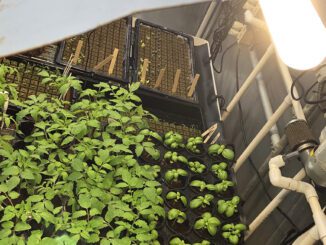
Above: This 4′ X 8′ area can produce thousands of seedlings or hundreds of market sized high quality transplants
Whether you grow crops indoors year round, in a greenhouse or outdoors seasonally there are some principles and practices to follow that can assist anybody, regardless of the scale of their endeavours that you can follow along with step by step in this how to guide. You’ll also learn how to produce transplants that are especially well suited for growing on in hydroponics systems (because no soil is being used to raise transplants).
This instalment, Seeding, will serve as part one in our Growing Transplants series to give you a strong start with producing your own flower, herb, greens and vegetables transplants. In further instalments we’ll look at other important aspects including rooting cuttings and selecting mother plants. You can follow step by step all the way along to planting or sales success.
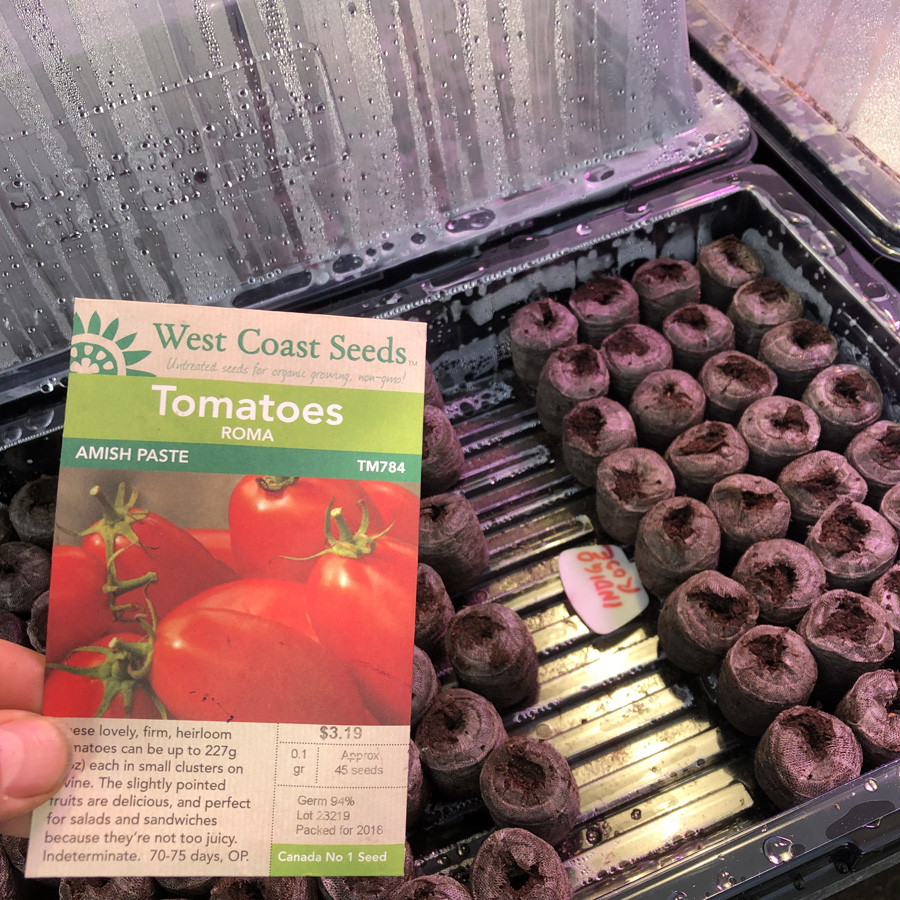
At some point or another every plant begins from a seed. In growing transplants, seed selection is very important. If you start with poor quality genetics, no matter how great the growing environment is or how much care you put into the garden your plants will be limited by the quality of their genetic make up. Here’s a quick break down of some of the types of things you should look for in selecting seeds to grow your transplants from.
Above: Most plants begin life as seeds
Growing Transplants Seed Selection Criteria:
Finishing Times
Given the same variety of plant, some cultivars will finish faster than others. This can be especially important if cultivating crops where there is a limited window of time to produce warm loving plants outdoors seasonally. Frost insn’t your only concern, although it is an important one—heavy rains once it becomes cool out later in the season can rot flowers or fruits; if your variety doesn’t mature in time you may have a poor quality harvest or yield.
Hardiness
Some varieties within the same family of plants may offer better resistance to common stresses like drought, plant disease, frost or insect damage. For example a seed pack may state that a particular variety shows strong resistance to Fusarium Wilt or sate that it is Drought Tolerant. If there are issues that are more prevalent in your area or garden type due to local conditions, selecting for these traits can be very worthwhile—just one more advantage of growing transplants versus buying young plants that may have been produced on the other side of the country.
Height
Within the same plant variety, you can often find a lot of variation in a wide variety of characteristics including height, ie final size of plants. A couple great examples of this are dwarf sunflowers and patio tomatoes. In both these examples, the fruits or flowers remain fairly large while the plant they grow own is very compact in comparison with traditional cultivars. Height can be an especially important consideration when container gardening.
Harvest Qualities
There can be very big differences in the characteristics of the flowers, herbs, greens and fruits you harvest. Look at Basil as an example—besides having many varieties of Sweet Basil seeds to choose from, Basil also comes in Purple, Lemon, Cinnamon, Spicy Thai and more!
Harvest Weight & Size
Some varieties will give you more biomass from the same plant versus others. While overall yield is often an important factor, it should not be weighted too heavily, pardon the pun. What’s the point in having more bushels full if nobody wants them because the harvest quality lacks character, quality or uniqueness?
Price
If you just need a few seeds, the cost per seed won’t likely play too great a role in your decision making process. However, when buying hundreds or thousands, cost becomes a factor. In our own experiences, a higher price doesn’t usually mean better genetics. Sometimes seeds are priced on the effort it takes to produce them, so if a variety is harder to make seeds from, the breeder will often want a higher price—ie price is more proportionate to the work related to produce the seeds rather than the quality of the genetics themselves.
Growing Transplants, When to Sow Seeds?
Timing counts when growing transplants. Besides considering the desired final planting date, consider that if you start growing transplants too early you may run out of room for the plants, ie they will get root bound and overcrowded in the space you have available for them. Overcrowded plants are prone to problems like insects and diseases.
If you start growing transplants too late, they might not be big enough for your desired planting date or unsalable because they are too small.
Seed packs usually have some information about when to sow seeds if you intend to transplant outdoors. When growing transplants with the help of supplemental grow lighting and a high quality soilless media like peat, coco coir, oasis, rockwool, etc you can start later than the pack suggests because your plants will be healthier and grow faster than the windowsill directions most common seed packs are based on.
As a rule of thumb, you reduce the time by 25 to 30% with added grow lighting and a high quality propagation media.
Things To Manage
There are several important factors you will want to have some level of control over when it comes to producing healthy and robust transplants from sowing seeds.
Temperature
This is likely the number one factor you will want to have some influence over. Different plant types prefer to germinate at different temperatures (check your seed pack), so it is important that you don’t over look this. Since the seeding media is kept moist to germinate seeds, if it is too cold or too warm it is easy to wind up with rots and funks that will kill seeds or promote wilts and other problems in the young seedlings that result.
TIP: Seedling heat mats, as pictured, on average will give a 10 deg F lift over room temperature; usually perfect for common crops like tomatoes, peppers, flowers and herbs (around 75 to 80 deg F optimal germination temperature). Note, most types of edible greens like kale, lettuce and spinach prefer cooler germination temperatures, ie 65 deg F. Seedling heat mat controls are available so you can se the exact temperature you desire—they even have a probe you can stick into the germination medium for an exacting level of control.
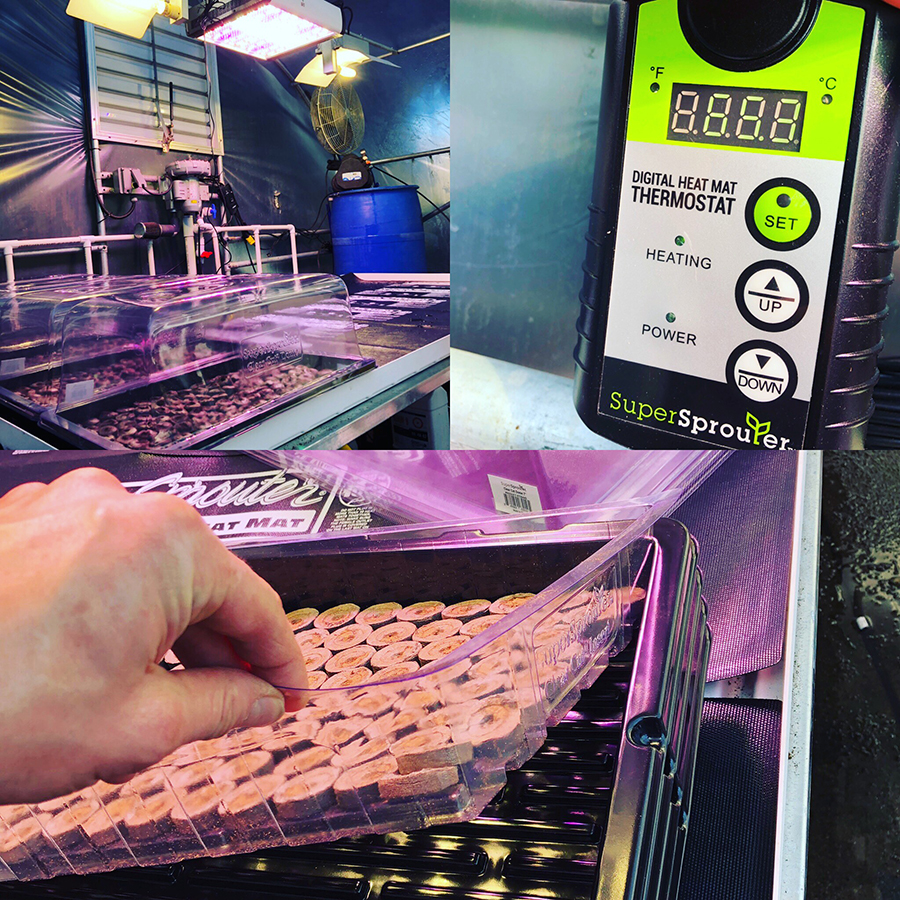
Above: Super Sprouter seedling heat mats, control and trays
Moisture
Everyone knows seeds need moistures to germinate, however, water quality counts too. Water that has lots of impurities can set back germination and impede early development in young seedlings. Filtered water or rain water is best. Less experienced gardeners sometimes run into troubles with moistures management, ie keeping things soaking wet or letting the seeds dry out. Once you apply water is is very important to keep seeds evenly moist—if they dry out at all, that could permanently end their growth; seeds are very sensitive to moisture.
TIP: Using a humidity dome is a great way to keep the seeding media or pellets moist after their initial soak and will also help to retain warmth; the most vital ingredients in getting your seeds off to a healthy start. NOTE how much your seedling tray weighs in your hands after the initial soak down with water, also note the colour of the media when soaked. Learn to feel the weight and watch the colour so you know when it is time to apply moisture again when necessary.
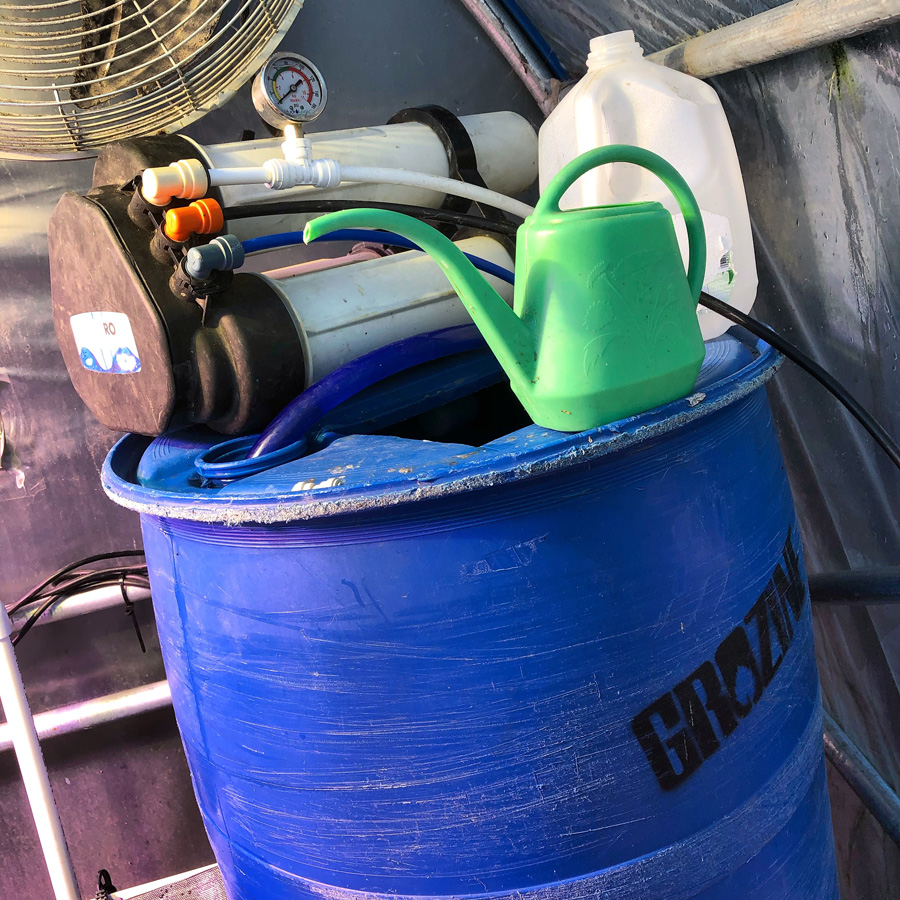
Above: Filtering water can lend to better results for germination
Light
Some types of seeds require the presence of light to germinate, others do not. Typically, very fine seeds like basil, which are not buried but broadcast onto the surface of the germination media will require light. Otherwise, just warmth and moisture will stimulate germination. However, as soon as seeds germinate and sprouts emerge, they are on the hunt for light. If there is only limited light available, your seedlings will stretch looking for light, and become thin and weak. Adequate light levels keep young plants sturdy, healthy and strong.
TIP: At the minimum, a full spectrum fluorescent light fixture should be suspended above your seedlings during germination. For most plant types, 16-24 hours of lighting per day is recommended. For larger areas, CMH (Ceramic Metal Halide) grow lights cover more area for less power versus common T5 fluorescent grow light fixtures. A single SUM150 (150 watt CMH fixture) is plenty of lighting for a three foot by four foot area to raise seedlings to a sturdy few inches tall. As they get bigger, they will need more light or you can thin the seedlings out to the best specimens and reduce the overall area of coverage to provide increased light intensity.
Growing Transplants, Sowing Seeds Step By Step
Before you get started, have a quick look at this checklist of essentials and useful stuff
-small watering can
-propagation flats and humidity domes
-seeding media: ie plugs, pellets, cubes, or tray inserts for filling with your grow media of choice
-thermometer
-heating mats and control (optional)
-supplemental grow light
-timer (optional)
-pH test kit and adjusters
-permanent marker or label gun
NOTE: you don’t need fertilizer when germinating seeds. In fact, it could harm them. However, as soon as seedlings begin to grow a full spectrum diet of plant nutrients is critical for soilless grow medias like peat, coco, rockwool or oasis.
TIP:Fulvic or Humic Acids can improve germination rates and improve the biological characteristics of many types of soilless growing media
Growing Transplants, Step One: The Area
Find a suitable area. One that doesn’t have cold drafts, ie door ways or windows is best. Make sure the area is tidy and free of old soil, houseplants, etc. You don’t want your transplants getting insects or other problems from their surroundings. A table or bench up and off the ground is ideal.
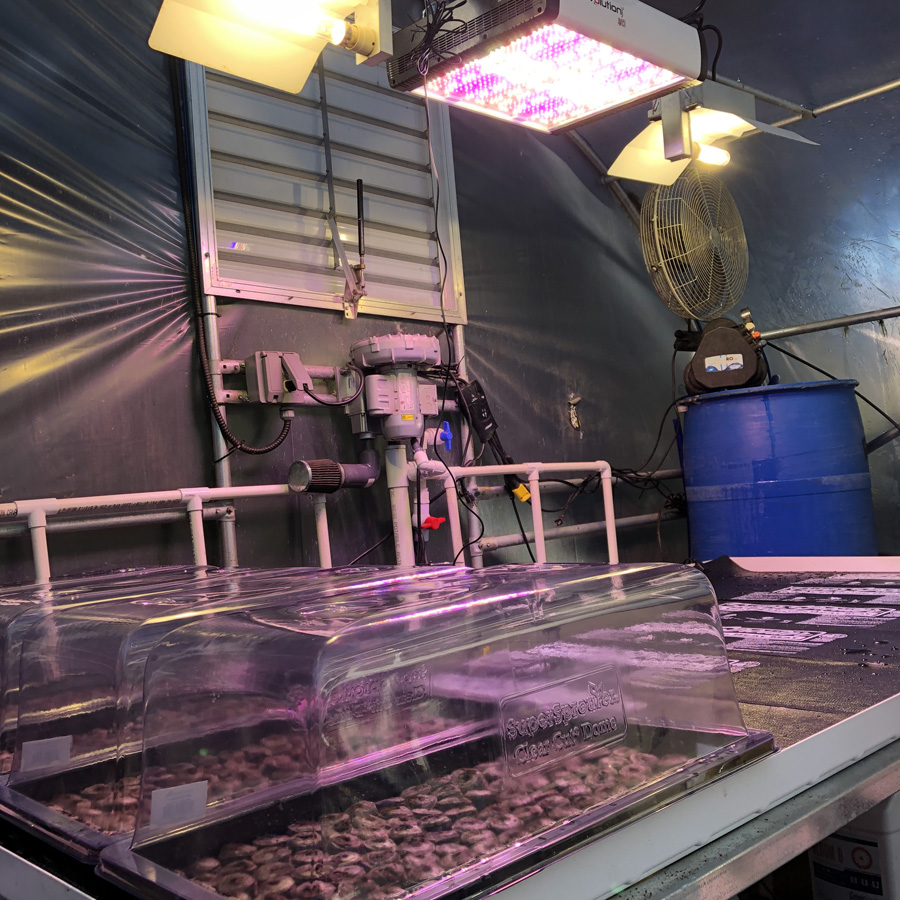
Growing Transplants, Step Two: Supplemental Grow Light
Hang up your grow light. Make sure that it is well anchored and that any power cords will not get tripped over or wind up in any water that may get spilled. A fluorescent fixture is usually good about twelve inches from the tops of your trays—you will want to be able to adjust the height as seedlings begin to grow, A 150 watt CMH fixture can be two to three feet above the seeding flats and adjusted as plants begin to grow.
Pictured in our set up is a combination of LED and CMH grow lighting to cover a larger area and assist in growing out transplants–good for 300-400 six inch tall transplants or thousands of seedlings in a 4′ X 8′ area.
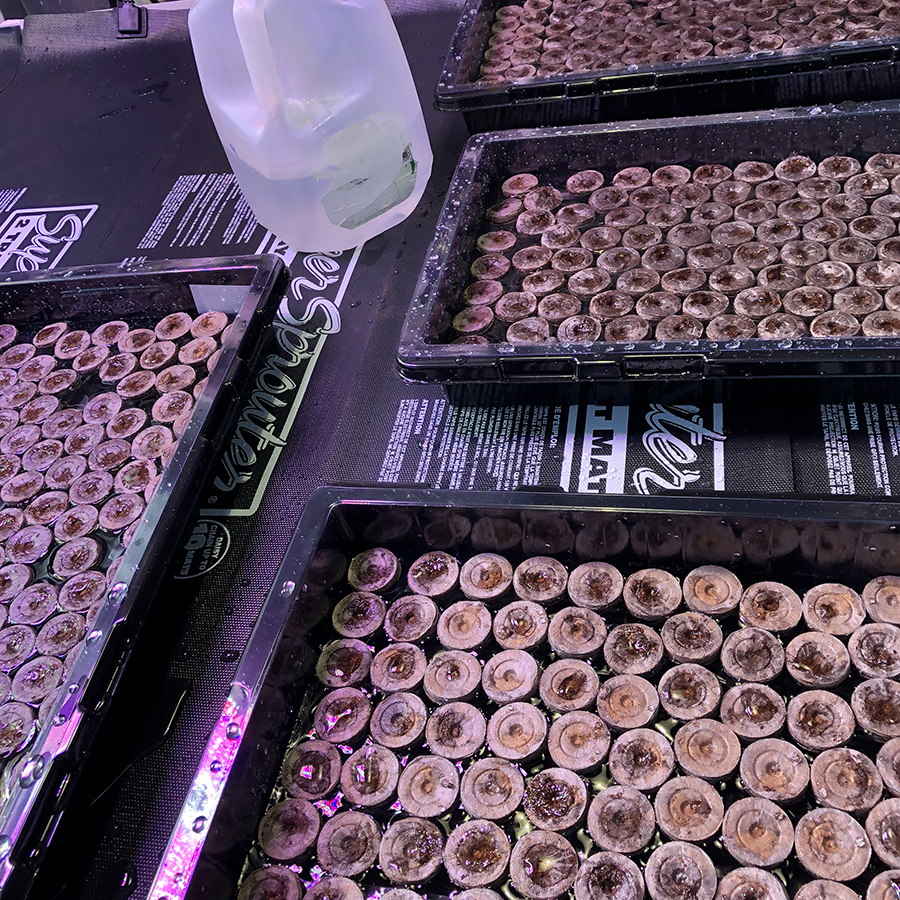
Growing Transplants, Step Three: Filling Trays
The most common sized plastic nursery flat measures ten inches by twenty inches. Theres are often referred to as “ten twenty” flats. A single flat is a good size for starting around 100 seeds, give or take. The tighter you pack seeds in earlier on, the sooner you will have to transplant into the next container or cell size up to avoid overcrowding once they begin to grow.
Starter pellets or plugs are convenient and effective, some come as a preformed sheet making it tidy and quick to fill the tray. Filling the entire tray with a two inch depth of soilless media is an option too, although young plants may suffer more transplant shock when you move them up into the next phase growing transplants.
If you have seedling heat mats, set them up and plug them in now following the suppliers instructions, placing your trays on top.
Growing Transplants, Step Four: Preparing the Seeding Media
Most seeding medias won’t require too much consideration as far as pH goes because you are just adding filtered water to start with. Rockwool is an exception and requires a pre-soak at a low pH, ie 5.5 for 24 hours to stabilize and counteract the alkaline nature of the material. For most seeds, the optimal pH in the germination media is 5.8 to 6.4. This is where a pH test kit and pH adjusters can be handy—they are relatively inexpensive and easy to find.
Soak the medium until run off with filtered water that ideally has been pH adjusted to suit your choice of growing media. Wait a little while after soaking and make sure there is no standing water in the trays. A full tray can be heavy, so be careful picking them up and moving them around or they can rip or tear, especially the budget types. After draining, let the seeding media warm up to the desired temperature before proceeding.
TIP: A clean turkey baster is a great way to get excess moisture out of your tray without having to move it around.
Growing Transplants, Step Five: Planting Seeds
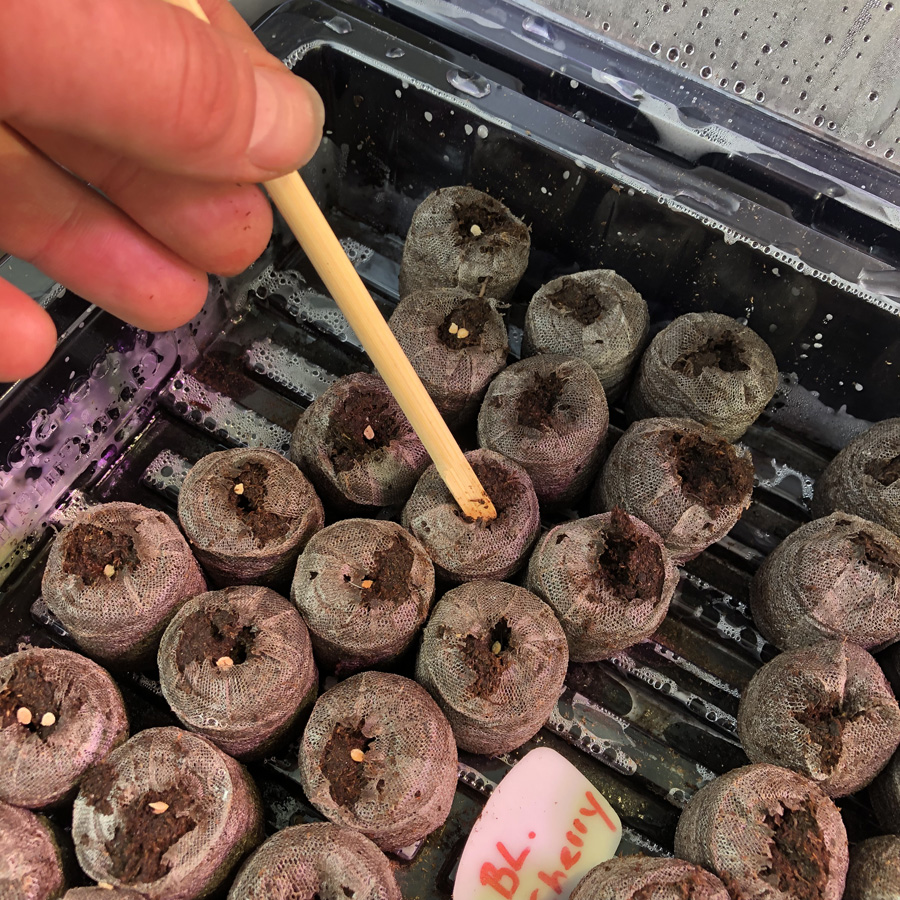
After the seeding medium is at the right temperature, you are almost ready to plant! Now is the time to create a furrow (shallow trench) or poke holes into the seeding media at the right depth for your seeds, if applicable. As a rule of thumb, plant seeds at least twice the depth of their size. So if a seed is one eighth of an inch in size, plant at least at a 1/4” depth. A clean chop stick is a surprisingly handy tool for poking seeding depths—you can then use the blunt end for tamping down the media once planted.
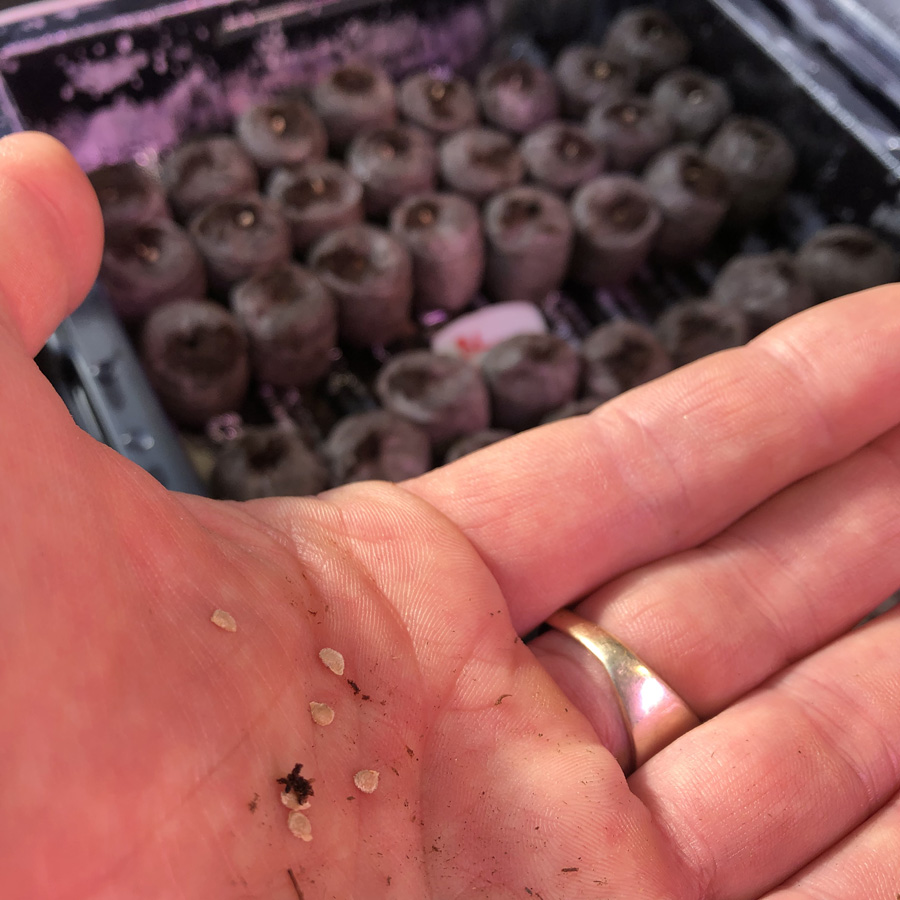
Plant your seeds! Emptying out the package onto a clean plate and using clean fingers works well, although seed shakers are also available to make things a little easier and speed up this process.
Sometimes every seed in the pack will germinate, but don’t count on it. Putting two to three seeds per planting hole and then thinning, if necessary, is an easy way to help make sure each plating site in your tray will count.
Tamp down (gently cover) the planted seeds with blunt end of a clean pencil or chopstick.
VERY gently trickle or mist a little filtered water onto the tops of your stater pellets or plating medium—be CAREFUL not to wash tiny seeds away. This extra bit of extra watering (even though the medium is moist already) helps ensure good seed contact with the most media which is of critical importance.
Caring for Seed Trays During Germination
DO keep a watchful eye on temperature inside the humidity dome; a minimum maximum thermometer is great for this. Move the light closer or further away and/or adjust heating mat temperature as necessary.
DO NOT let the seed starter media dry out, ever. However, DO ensure that it drains freely and does not stay water logged for prolonged periods (see STEP FOUR, above, for helpful hints)
DO NOT handle the germination media without washing hands throughly; it’s not hard to contaminate moist and warm media with stuff you may have picked up onto your finger tips
DO remove humidity domes once more than 65% of the seeds in the tray have germinated. If left on for too long, young seedling growth will be very soft and stretch due to excessive humidity levels.
DO start feeding young seedlings with one eighth to one quarter strength fertilizer once the first true leaves from (the first set of leaves after the seed leaves AKA cotyledon)
Well, that’s it for now—these detailed Step By Step instructions should start you off growing transplants from seed just like a Pro. Stay tuned for Growing Transplants Part Two where we’ll discuss cloning via rooting cuttings, mother plants, transplant and pre-veg.
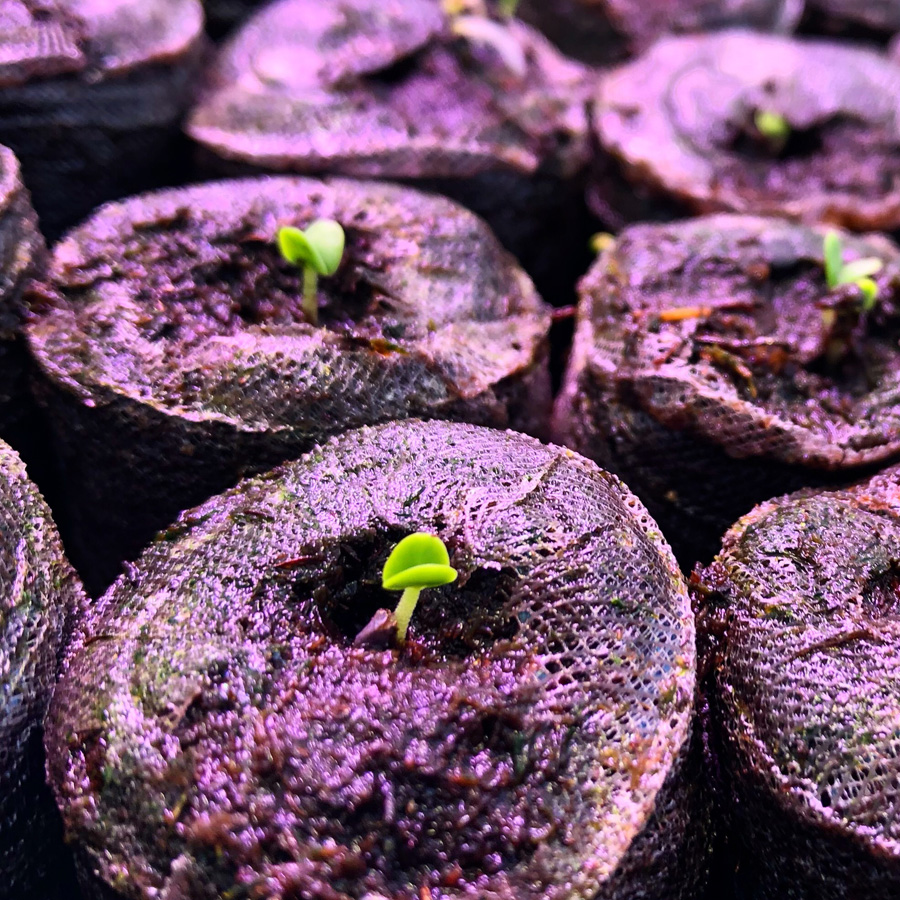
Above: Cotyledon (seed leaves) are the first to emerge during germination–they hold stored food for seedlings