Transplanting Grow Tips Hydroponics to Soil
There some fundamental principles you can follow when transplanting all types of plants for a seamless transition, resulting in healthier plants that perform better. In Grozine’s Spring 2014 gardening start, we look at transplanting grow tips hydroponics to soil.
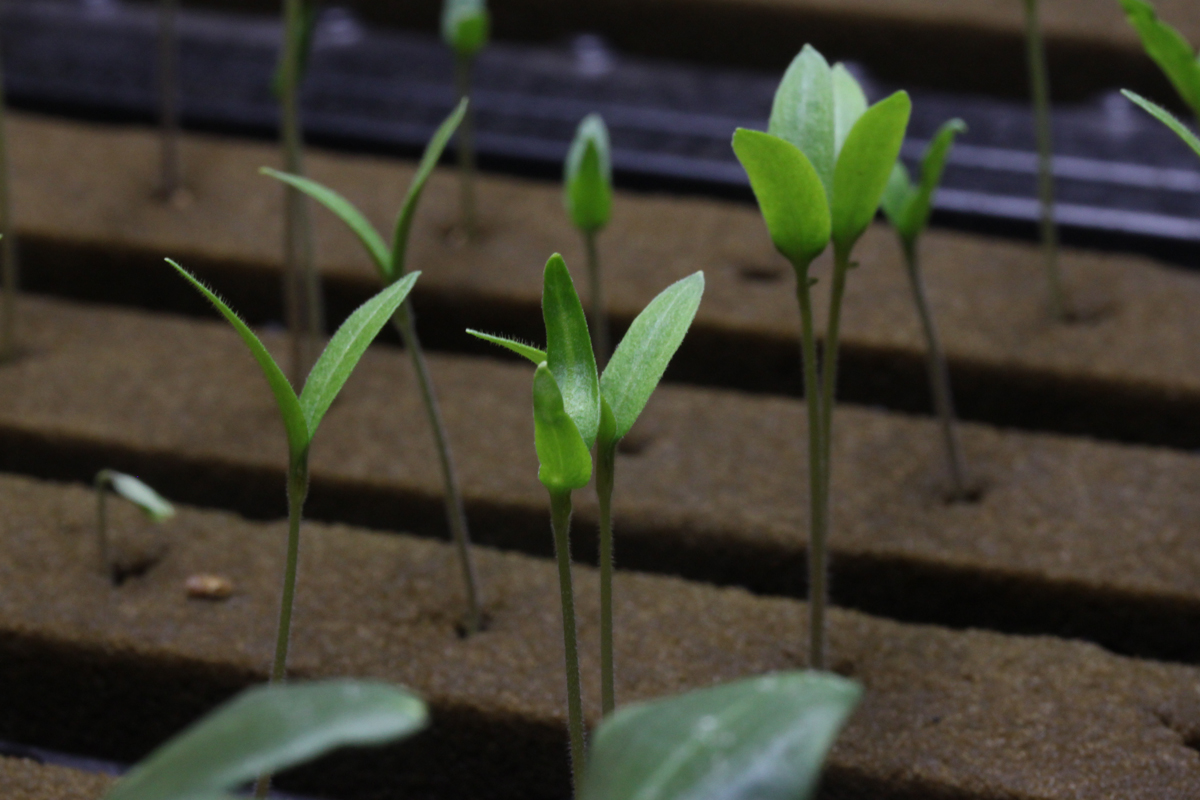
We started some seeds in a lightweight hydroponic media (Oasis) for a quick, clean and healthy start to our garden. Because we say “grow big” (and because our season for planting outside still approaches), we intend to raise our seedlings to garden transplant size in favorable conditions.
Setting up a small but productive transplant garden indoors was easy and will allow us to produce healthier (and better) plant varieties versus commercially bought. A good sized transplant is not easy to find once the garden season starts-and it’s not cheap either. It makes sense to raise your own for a number of good reasons.
Soilless peat moss mixes are relatively economical where this garden grows, so a high porosity professional soilless mix was chosen as the media to fill our transplant containers with, until plants are ready to head outdoors for the growing season. A sterile and fast draining media that has forgiving properties proves to be ideal for a variety of indoor gardeners. Compressed coco coir blocks are widely available, but tend to vary from supplier to supplier.
Fertilizer and Nutrient Feeding Tip:
Growing in coco coir may require special considerations with fertilizers, while commercial soilless peat mixes are compatible with just about anything.
What to Do BEFORE You Transplant:
Before you start to handle the newly developed and fragile root system of your germinated plants, make sure everything is ready and “good to go” to ensure a super smooth transition for your hydroponic seedlings.
Pre-Soak the Seedling Plugs. A mild vitamin solution and/or humic’fulvic acid solution applied half an hour or longer to the hydroponic seedlings before you start the transplant process helps prepare them for any stresses. Plants receive some level of stress when you transplant. The goal is to minimize it to keep them happy and productive. It’s all to your benefit.
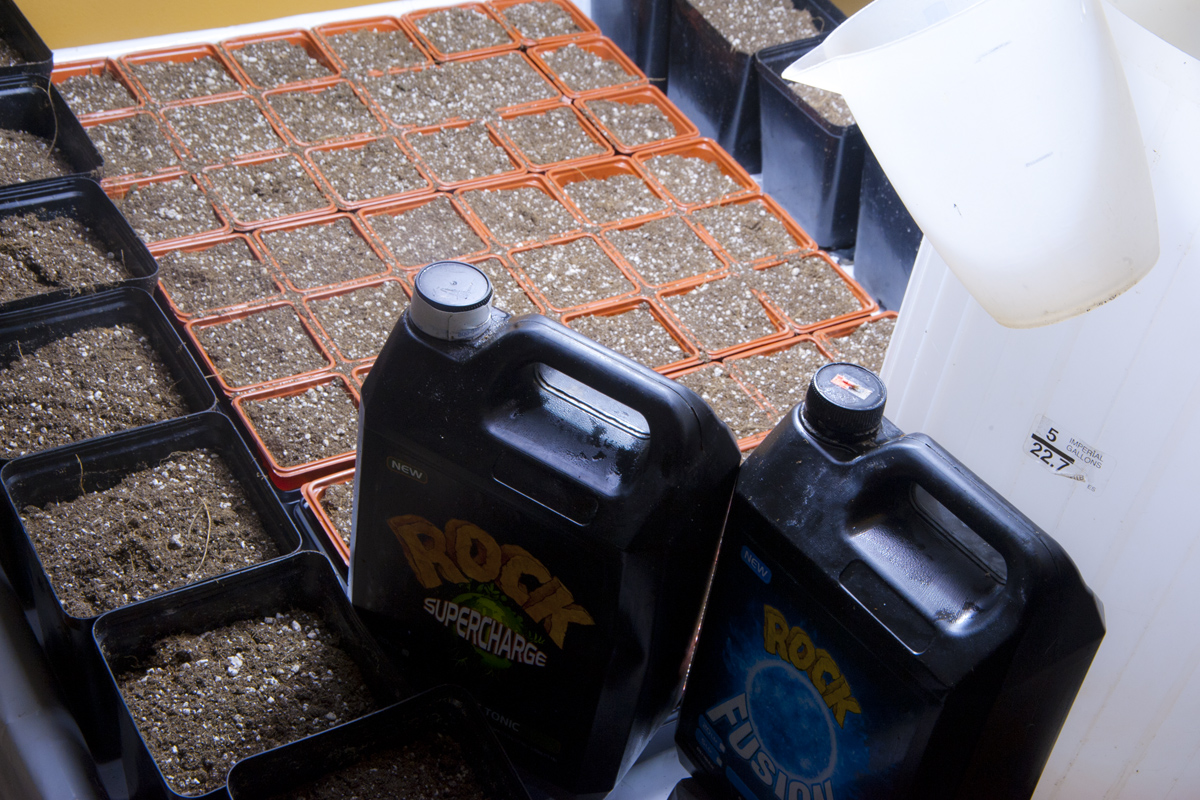
Lightly moisten the soillesss mix of your choice with a mild solution as described above. Rock Nutrients SUPERCHARGE is a great one.
Growing Media Tip:
Choosing a transplant medium that is relatively sterile and that contains a low fertilizer charge is often a good choice. This allows growers to control the fertility among the different varieties and plant types you are starting for transplanting to your outdoor garden. Its easy to apply synthetic or organic fertilizers when you water-there are a a wide variety of formulations available.
The Importance of pH
Professional soilless peat mixes are buffered well enough for the time your transplants will spend in the media before transplant into the garden or potting up. However, an inexpensive liquid pH test kit is a good investment for less than ten dollars. In a soilless peat mix a pH of 6-7 is acceptable in your water fertilizer mix Experienced growers fine tune this area.
Transplant Time
DON’T
over fertilize young plants, it makes for weak transplants that wind up with problems later.
DO
practice a feed, feed, water cycle using 1/4 to 1/2 strength fertilizers and root building supplements.
After the initial wet-down of the transplant media, let it warm up under the grow light you have set up.
Shut off the grow light about 15 min before you start transplanting.
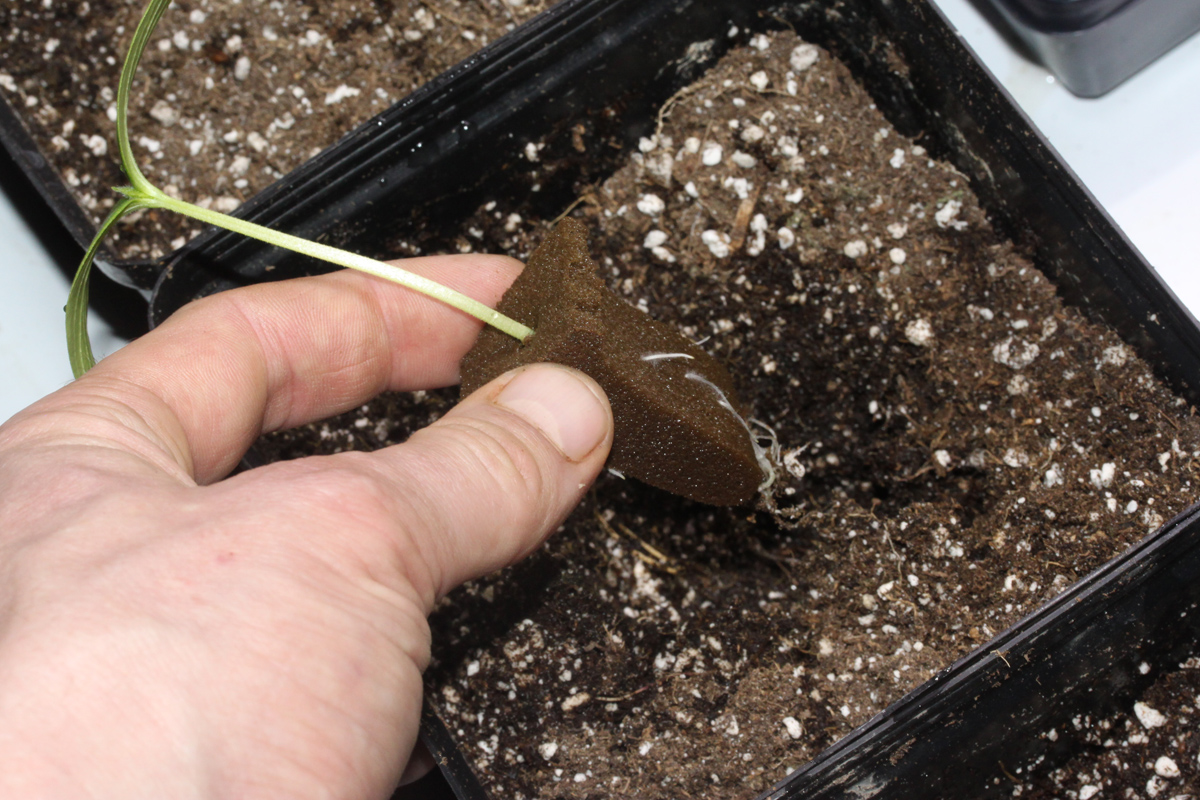
Poke a hole in the growing media that is deep and wide enough for your hydroponic seedling transplant plug to easily pop into. You don’t want to be forcing tender young root systems. Gently press down the soilless mix over top of the plugs.
Make sure the label all of your trays or pots as you go!
Once all the plants are in place, gently water with your mild transplant solution, as described, to help “glue” the new growing media to the hydroponic starter plug. AVOID OVERWATERING-you want it moist, like a cake.
Allow the plants to rest before several hours before they receive light or are placed under your lighting regimen via grounded timer with your grow lighting system.
Transplant Lighting Tip
Keep a 400W HID grow light fixture about twenty four inches from the tips of your plants. After a few days you can start to move it gradually closer, depending on your plant type and the lighting requirements. After plants are established a gentle air flow via fan is recommended to stiffen up the plants.
While optimal temperature requirements for different garden plants will also vary, maintaining a temperature of 75 Deg F proves to work well on a wide variety.