
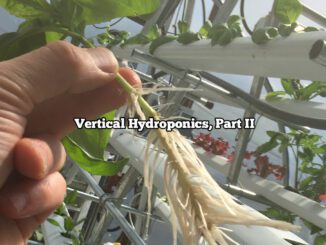
DIY Vertical Aquaponics System
How To Build Your Own Vertical Garden
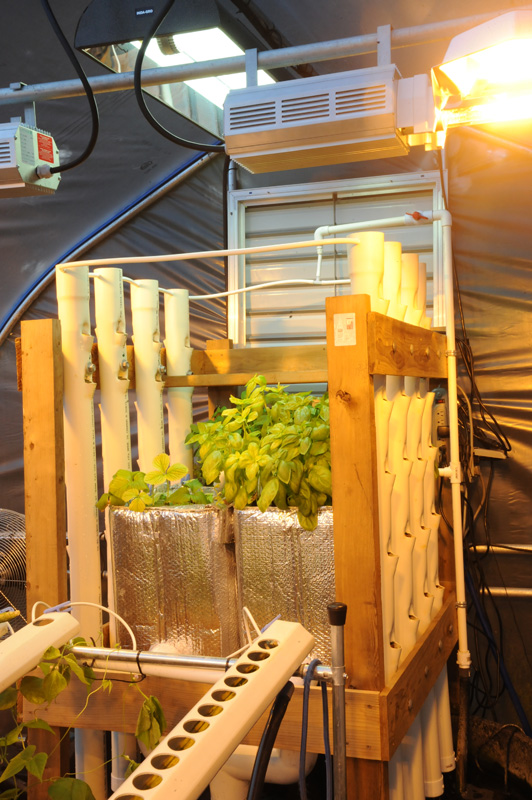
A DIY vertical aquaponics system can be a very rewarding weekend project. While setting up the fish part of the equation may take longer, as the necessary biology takes time to establish in the system, you can build hydroponic grow tubes inexpensively that will work great to take care of the plants you grow as part of your aquaponics system. A DIY vertical aquaponics system can be set-up to fit just about any sized aquaponics project, big or small. The system design we use here is very flexible and can be adapted for use in back yards, patios, greenhouse or even indoors where grow lights may be used to replace the sun. The system can easily be used as a hydroponic growing system if you want to get growing plants vertically without raising fish-additionally, it may even be converted to aeroponics with a few minor tweaks.
Vertical Growing System Advantages:
- Many more plants can be stacked up in vertical rows in the same square area, lots more yield potential in the same space
- Plants tend to finish compact and of very high quality, uniform plants can be harvested more frequently
- Vertical systems keep plants off the ground, no bending over to garden
- Easy to automate and move vertical tubes to different areas or straight to market
- Minimal materials and complication in system construction, inexpensive and reliable construction
- Easy to customize for your prefered cropping style and layout
- Very flexible, can operate outdoors, indoors with lights or in greenhouses. Great for Urban Farming.
***UPDATE April 28th, 2015: Video clip (below) of Our DIY Vertical Aquaponics System planted with Genovese Basil, from both Cuttings and Seedlings (as a comparison–stay tuned with our Daily Social Media Posts)
[youtube width=”560″ height=”315″ video_id=”W6pr92E7pP4″]
What Can You Grow in a DIY Vertical Aquaponics System?
Lots of types of plants thrive in Aquaponics. Usually lighter feeding plants like leafy greens or herbs are a great place to start. Beans often work well too. Larger heavier feeding crops like tomatoes can also be grown, but typically require a more mature system that has had time to accumulate the necessary micro biology and sufficient organic residues in the biomedia. When Aquaponics systems are managed properly, no outside fertilizer materials are required. The system is self contained and sustainable and often uses less water than conventional gardening methods. The fish are an added benefit, and can be grown for eating later or for beauty. Tilapia and Koi thrive in many climates as part of an Aquaponics system.
Learn BASIC Aquaponics | CLICK HERE |
How To Build A DIY Aquaponics System, Step By Step
Before you begin: building your plant growing system is one of the last steps in setting up a successful Aquaponics system, so please make sure you have all of your other considerations met before proceeding. If you choose to grow plants only via Hydroponics using the vertical system outlines, that works great too.
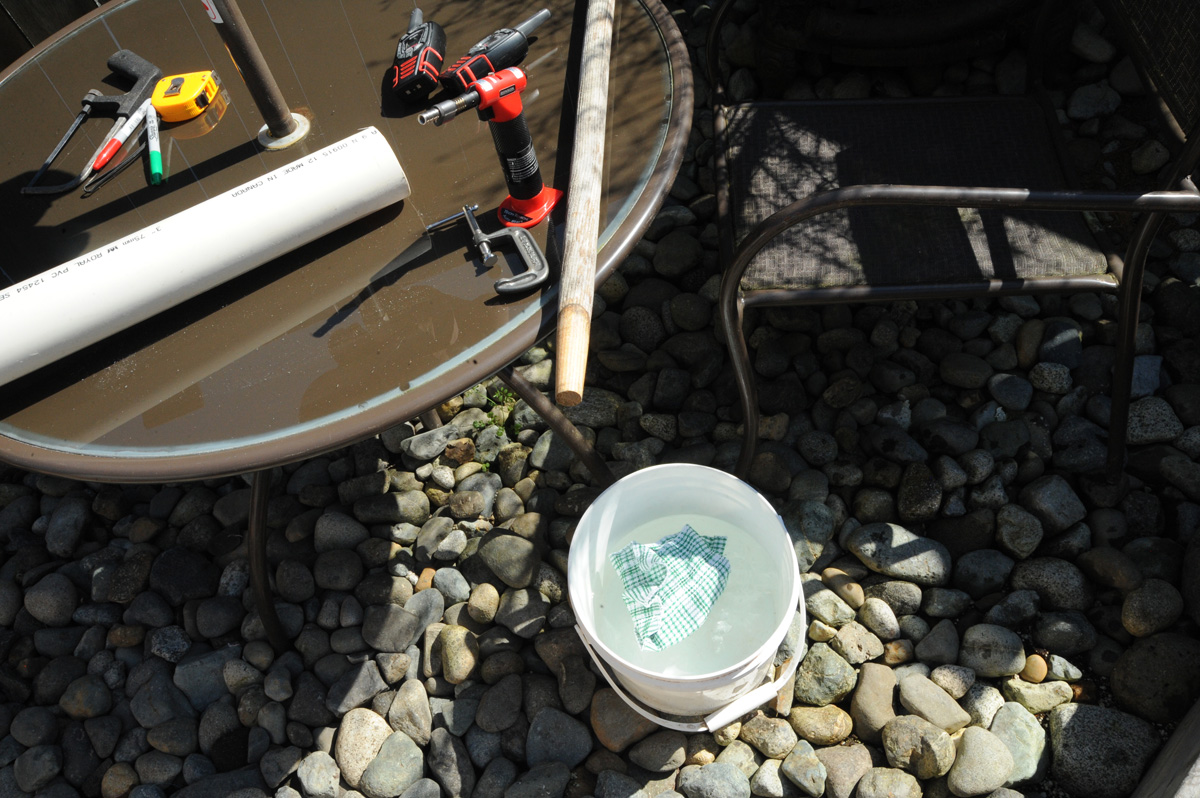
Materials & Tools:
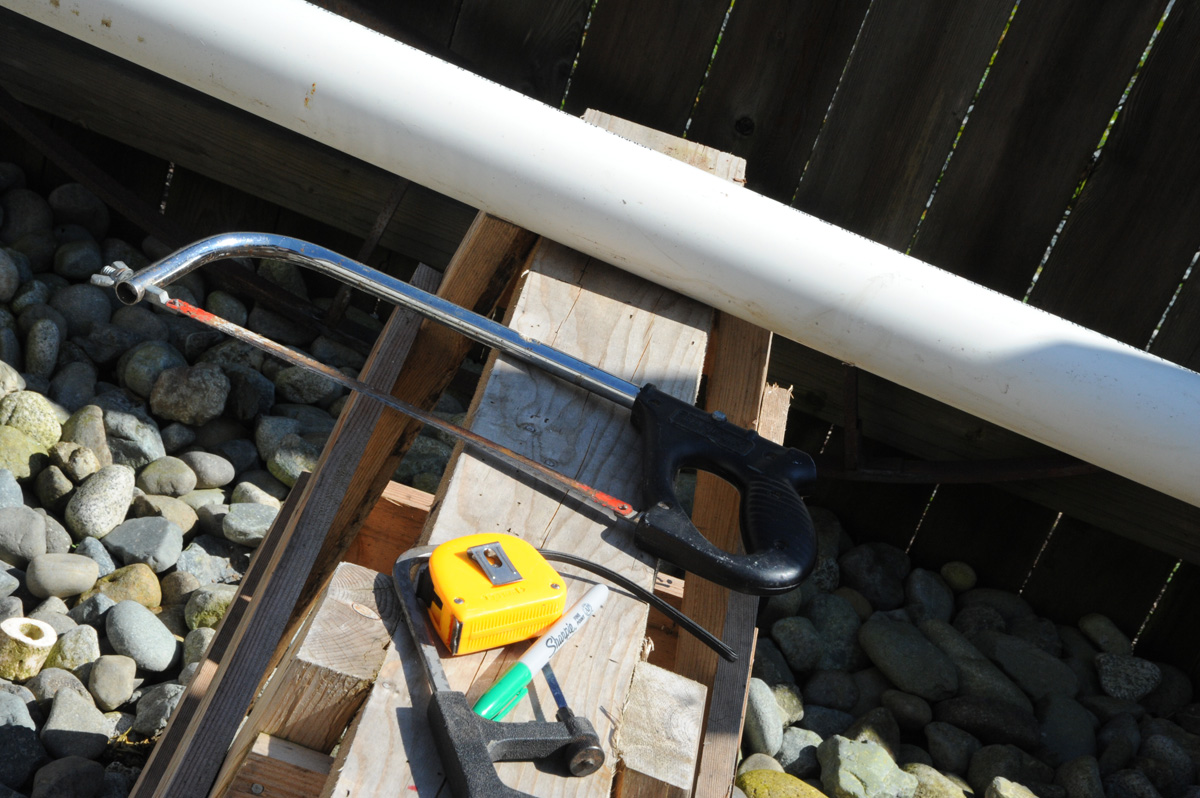
- measuring tape
- permanent marker or pencil
- support system to hold up tubes (we used cedar)
- actively circulating aquaponics tank or hydroponic reservoir (pump, tubing, tank, etc)
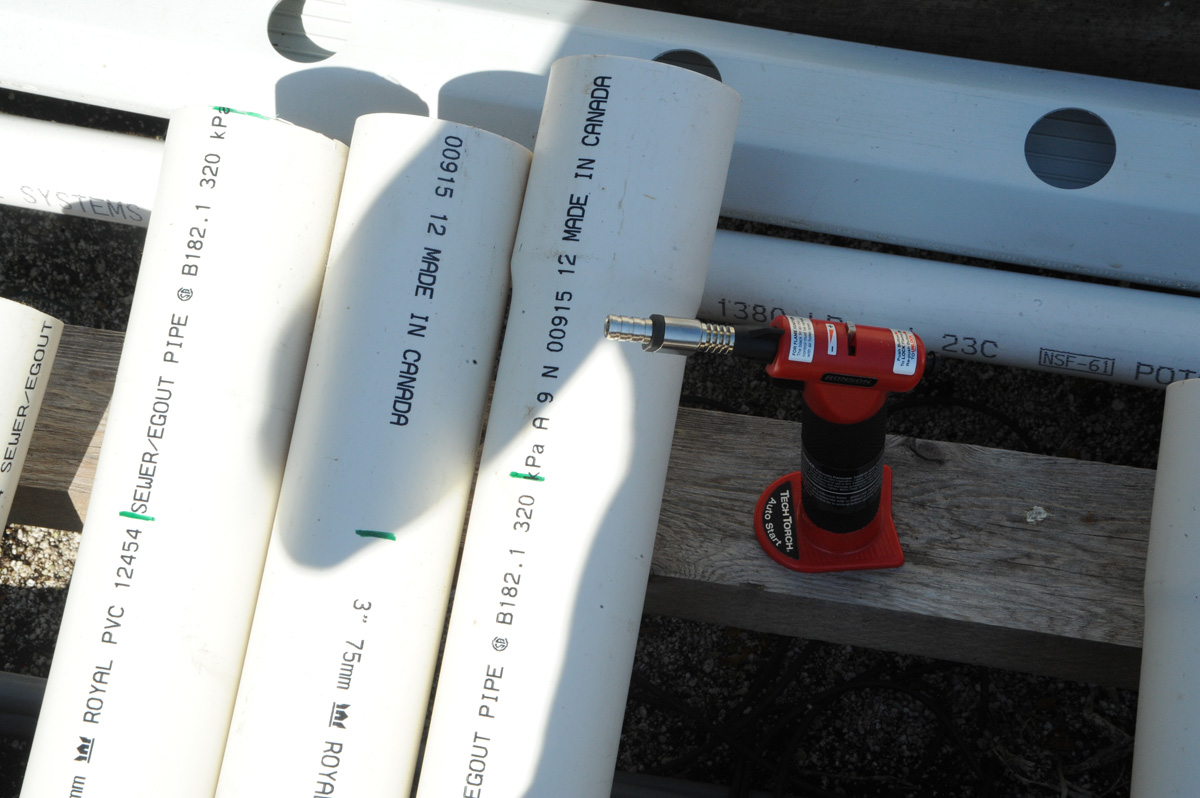
- 3″ diameter or larger plastic pipe, we used PVC here, about $15 for a ten foot length locally
- end caps for you choice in plastic pipe diameter (one per tube)
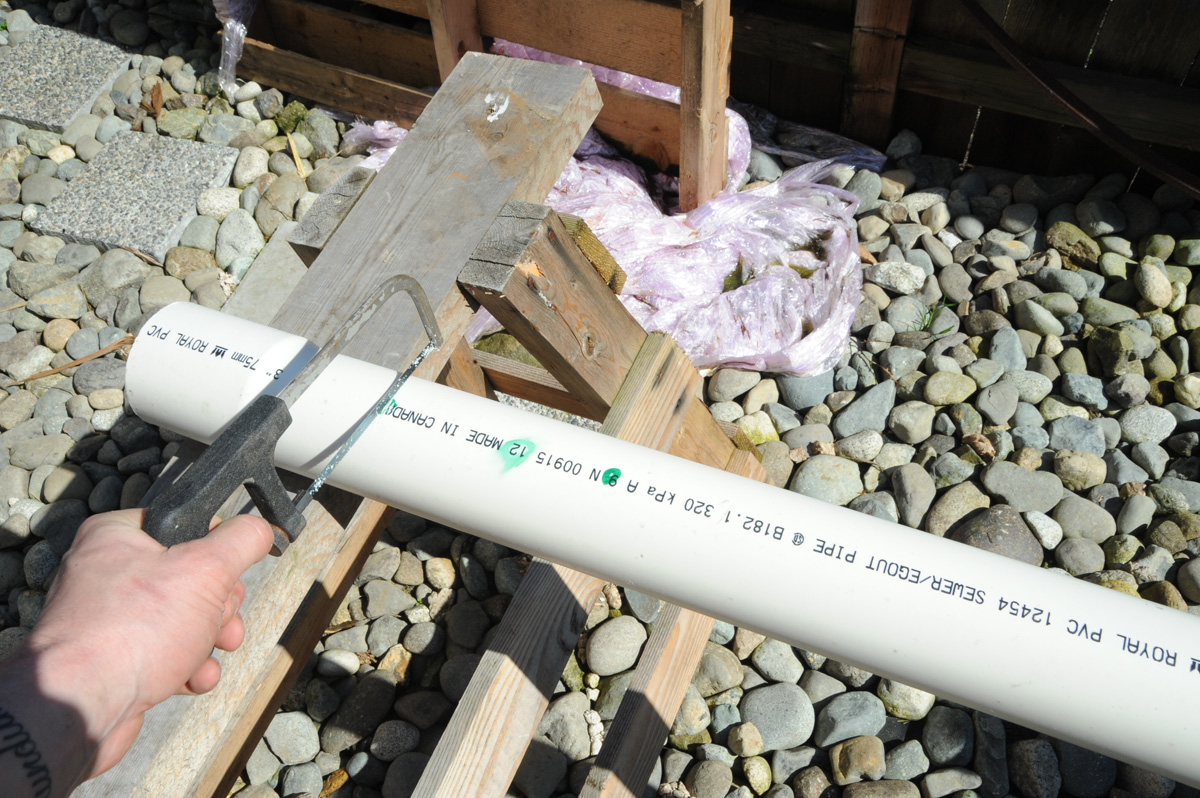
- hack saw
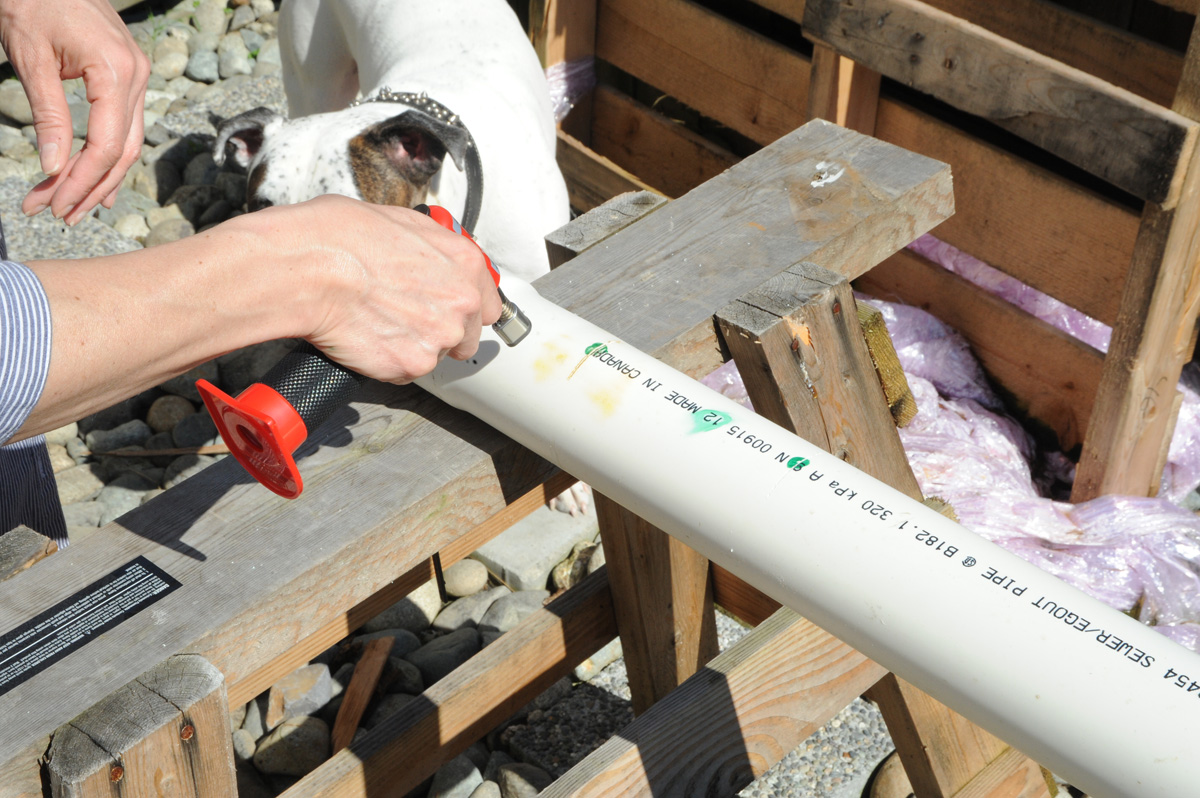
- torch (small butane type is best) or a heat gun
- wooden dowel, diameter will be your planting hole size-we used a shovel handle
- bucket, cold water, cloth
- 1/2″ diameter pvc pipe (conduit) in 3-1/2 inch lengths, two per tube
- 1/2″ X 5″ carriage bolt, washer and nut-two per tube
- adjustable wrench
- drill, 1/2″ bit, 7/8″ bit
- 2 adjustable clamps
- saw horses or work bench
- safety goggles, gloves
- sandpaper (optional)
- silicone sealant or appropriate adhesive
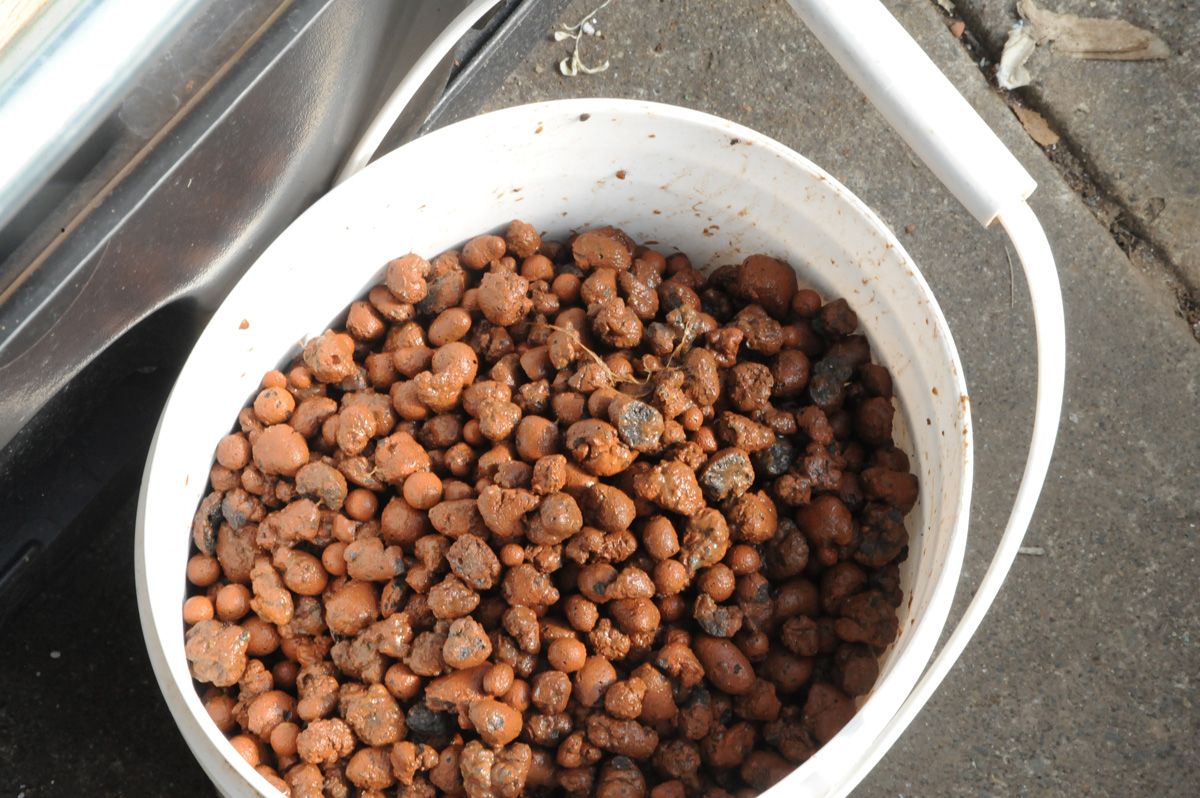
- biofilter media (hydroton, grow rocks, LECA, shale gravel, etc
Step One:
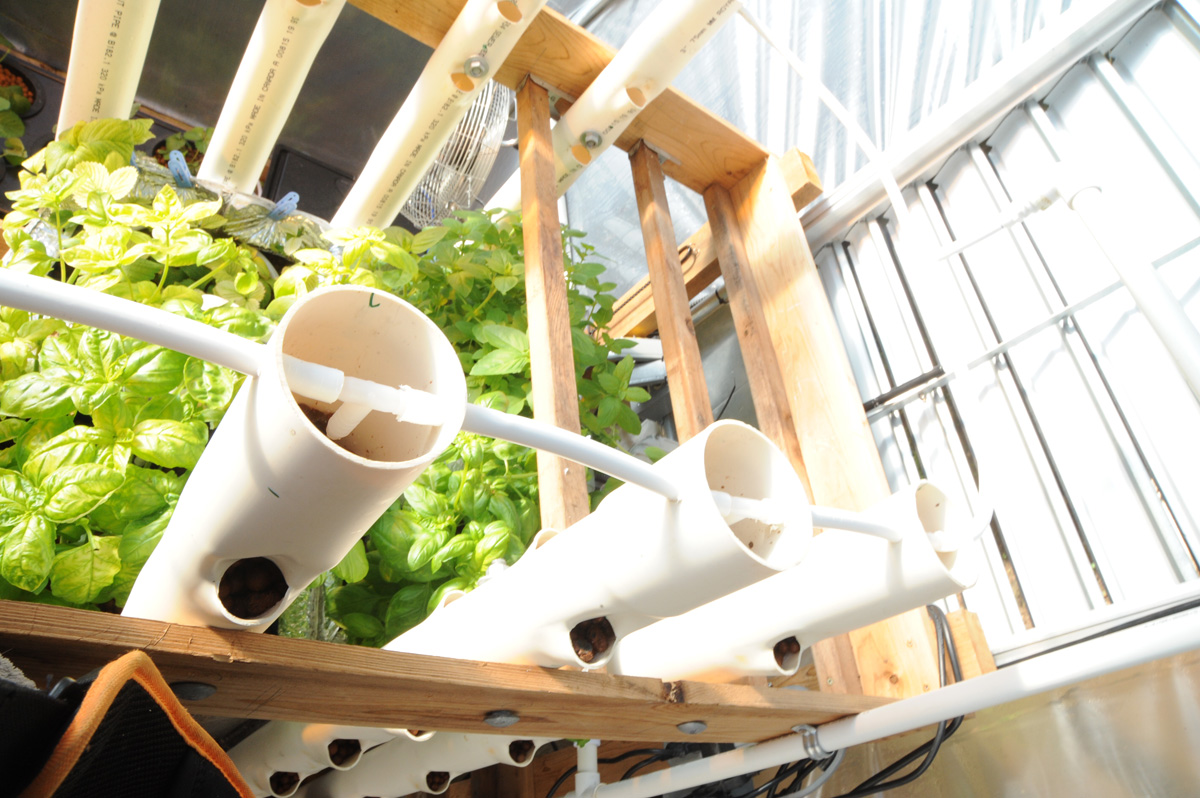
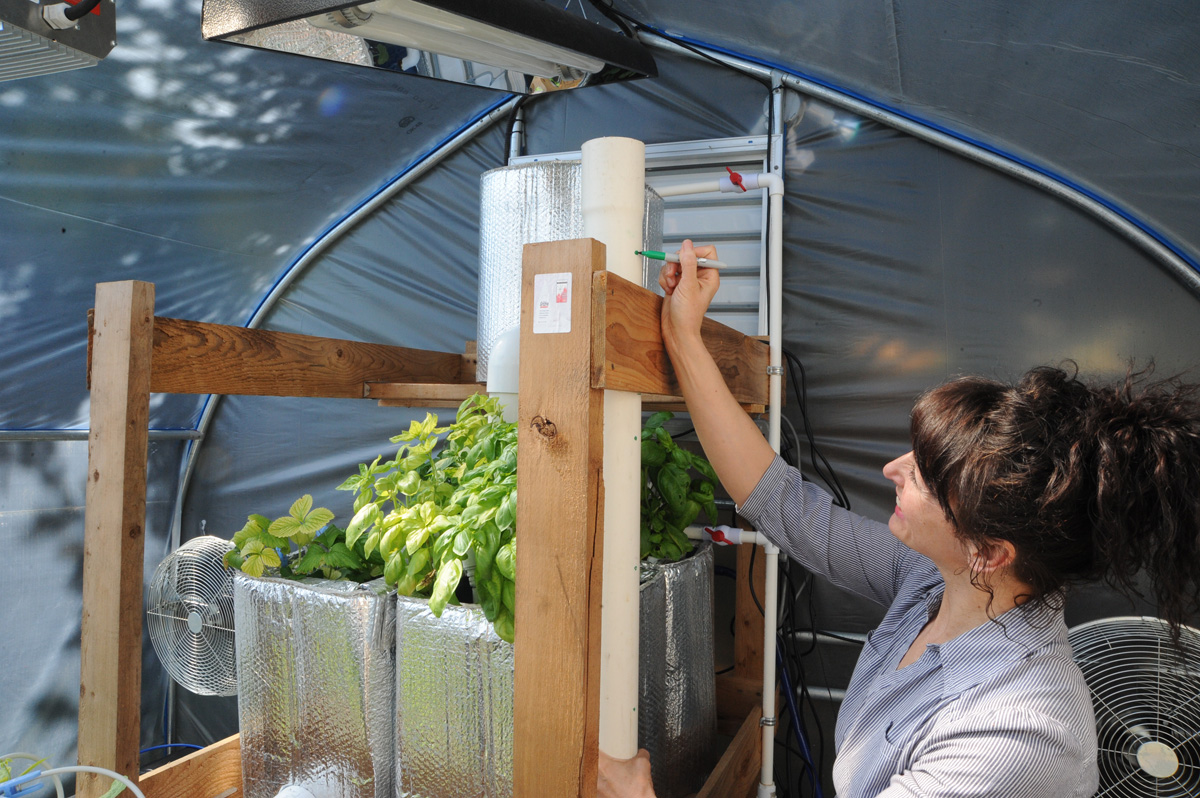
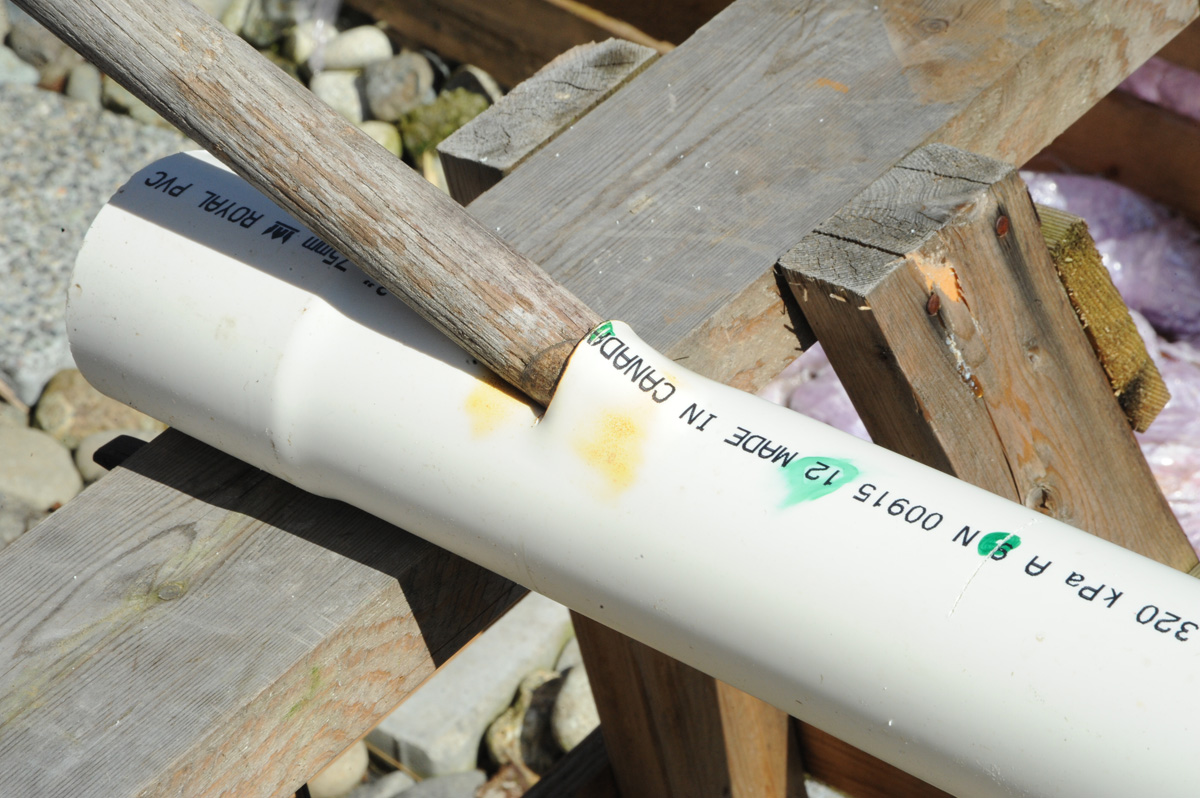
Cut the pipe you will make your grow tubes out of to your desired length. We found five foot lengths make good use of material and are still easy enough to handle when filled with growing media like expanded clay. Using a grinder wheel on a circular saw works great, but a hack saw gets the job done too. Next, you’ll want to square up and determine where to mount the tubes into the vertical support system once you are done. Mark where you will need to attach the tubes the support (to bolt-thru later). Then mark where and how many planting sites you will want per tube. Think 360 degrees here–the beauty of vertical growing and making great use of space!
Step Two:
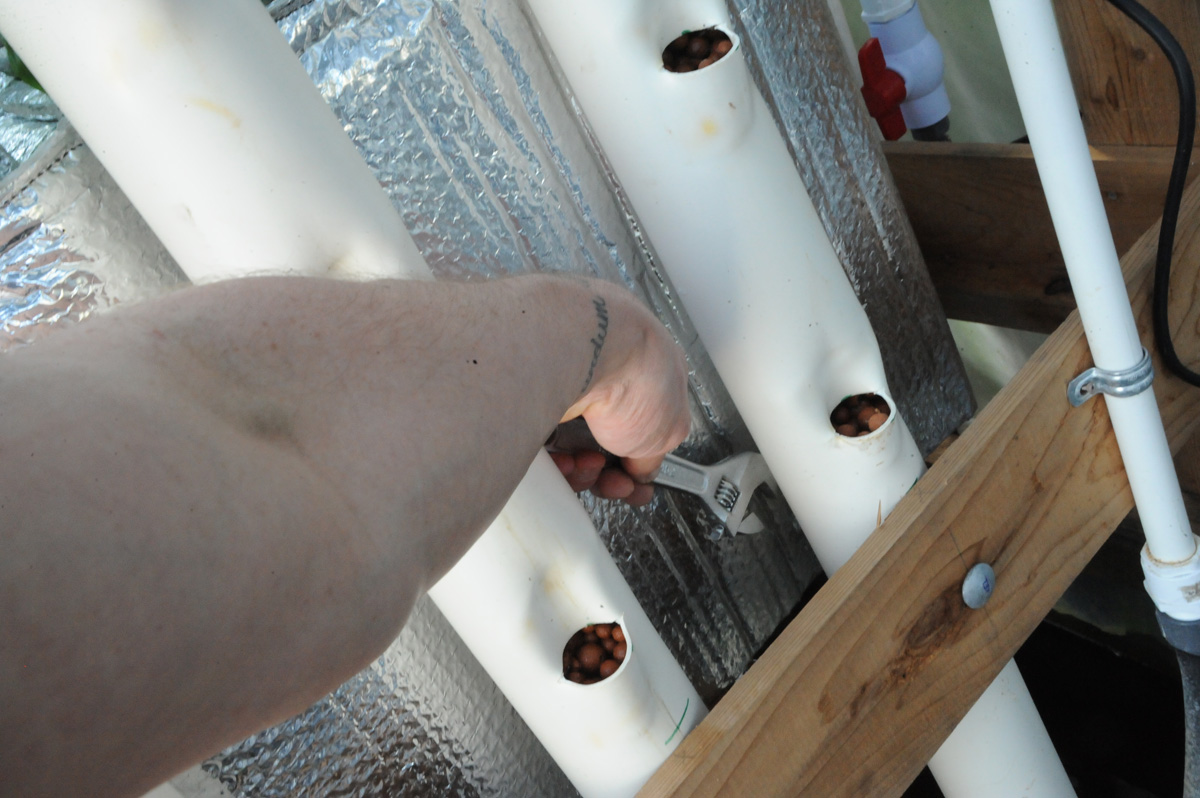
Clamp the pipe down at each end to your working surface. Make a slice just through the wall of the pipe at each planting site you want to create using a hack saw. The length of the cut should be about the final width of the planting hole size you want when finished. Note where you will need to drill holes for creating bolt guides to hold the tubes to the support system later. Double check your configuration and placements against the support system one final time before proceeding.
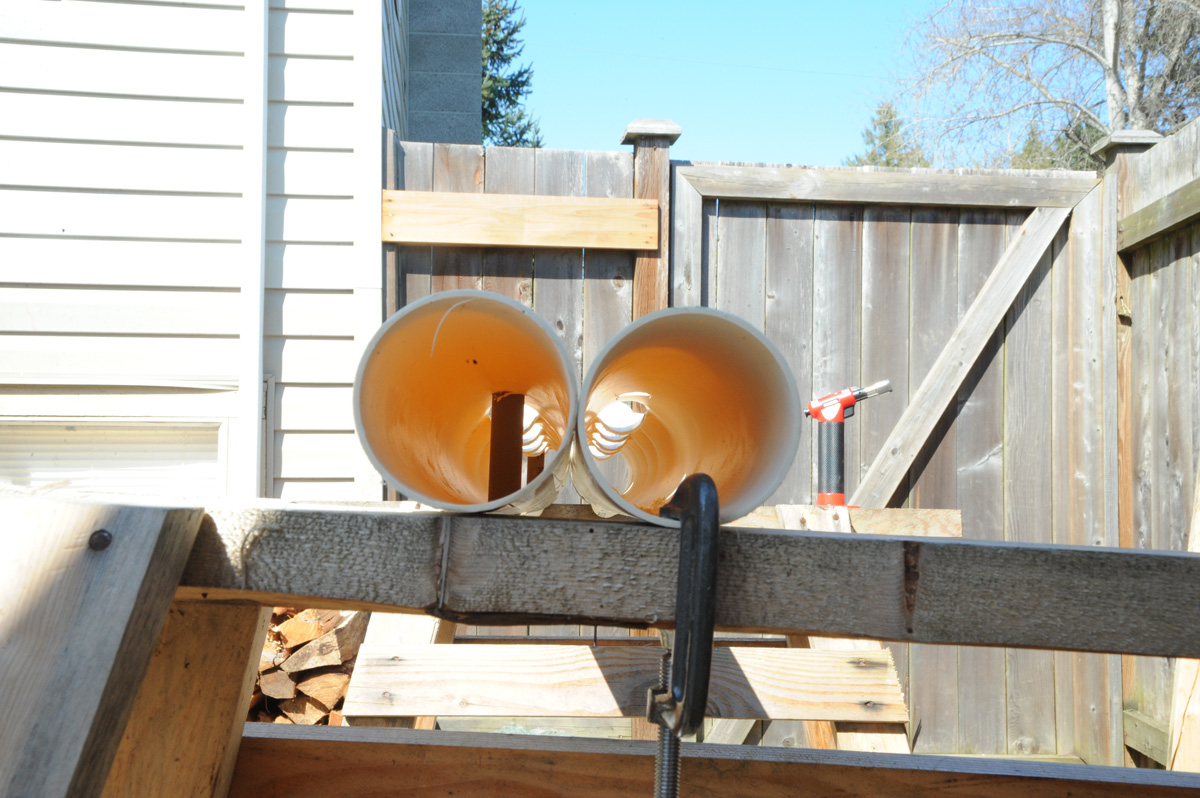
Step Three:
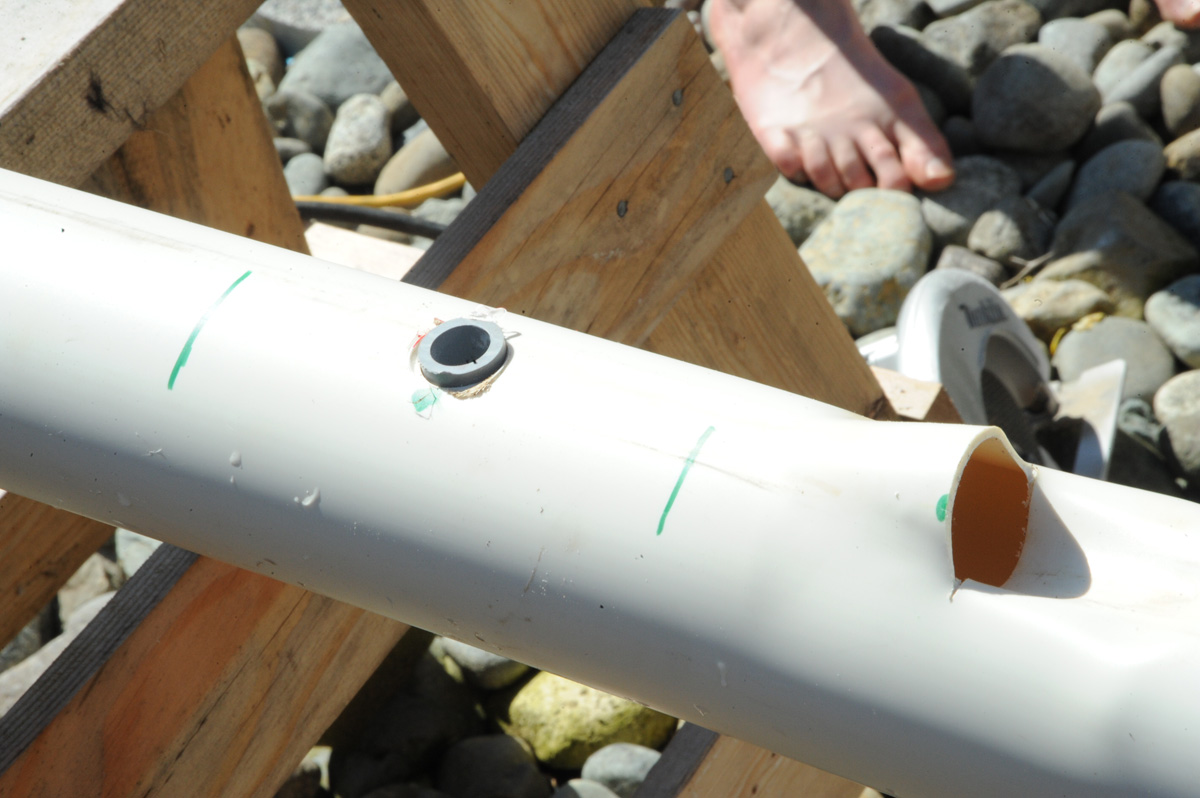
Make sure you have a bucket of cold water on hand with your cloth ready. Your dowel, the piece you will use to form the planting hold in the tube should be handy too. You’ll need to be able to work quickly with the material once you’ve heated it up. Carefully, using a torch or heat gun, heat the area where you have made the cut with using the hack saw earlier. Keep the torch moving, and do not use a strong flame or the plastic will scorch easily-never keep the torch in one spot for more than a second, and heat a little beyond the edge of the cuts; the material will need to stretch here too. Once the plastic is soft (you can see it with practice), slide the dowel or handle in, on the desired angle and evenly pry the planting hole open, with a rim on the outside of the tube. Place the cold wet cloth over the insertion, with the dowel still in. Press firmly and evenly with the cold cloth. The hole sets quickly.


Step Four:
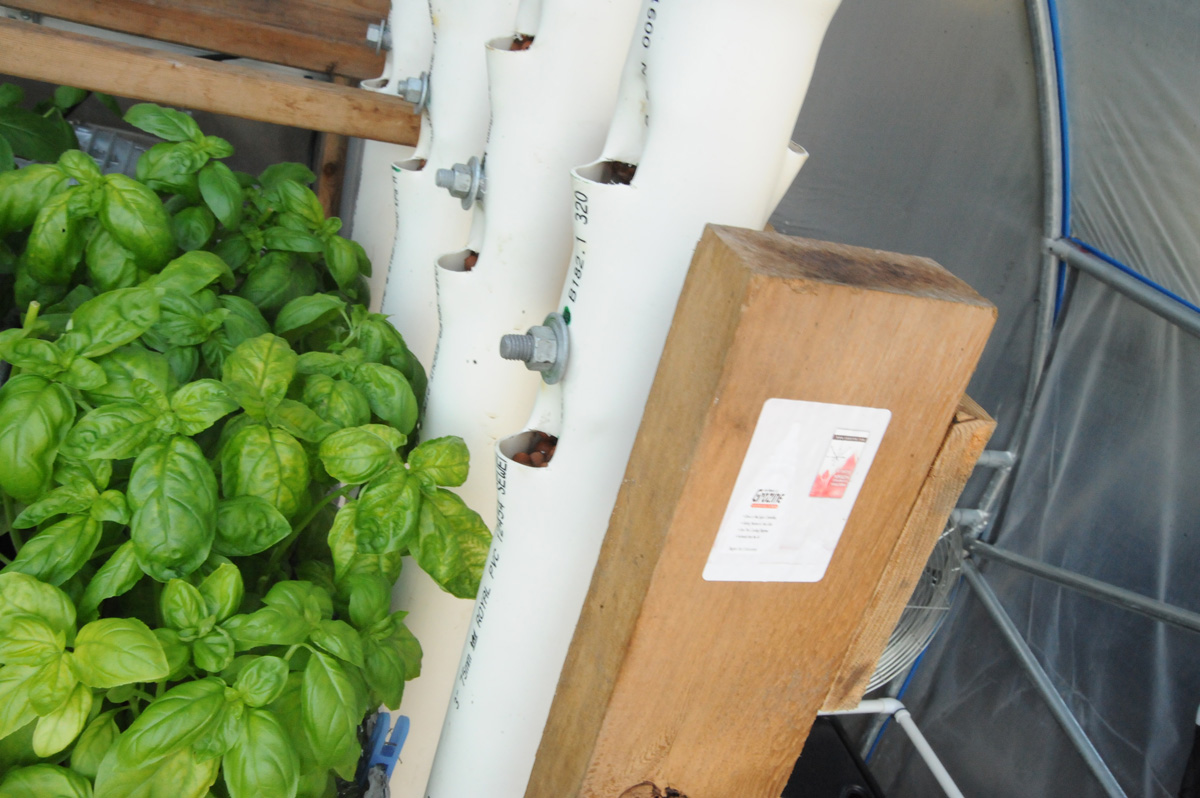
Once you’ve got all your planting sites formed on the tube on all sides, drill out the where the pipes will attach to the vertical support system-a 7/8″ diameter hole saw made a snug fit for our scrap lengths of PVC conduit, which we used adhesive to seal up. Alternatively, robber grommets could be used, but at four per tube, that adds to the cost significantly. This is an important feature, so the system doesn’t leak at the connections to the vertical support. Metals with galvanized coating should not come into contact with aquaponics water or hydroponic nutrient solution. They will corrode and potentially leach harmful substances into the system.

Step Five:
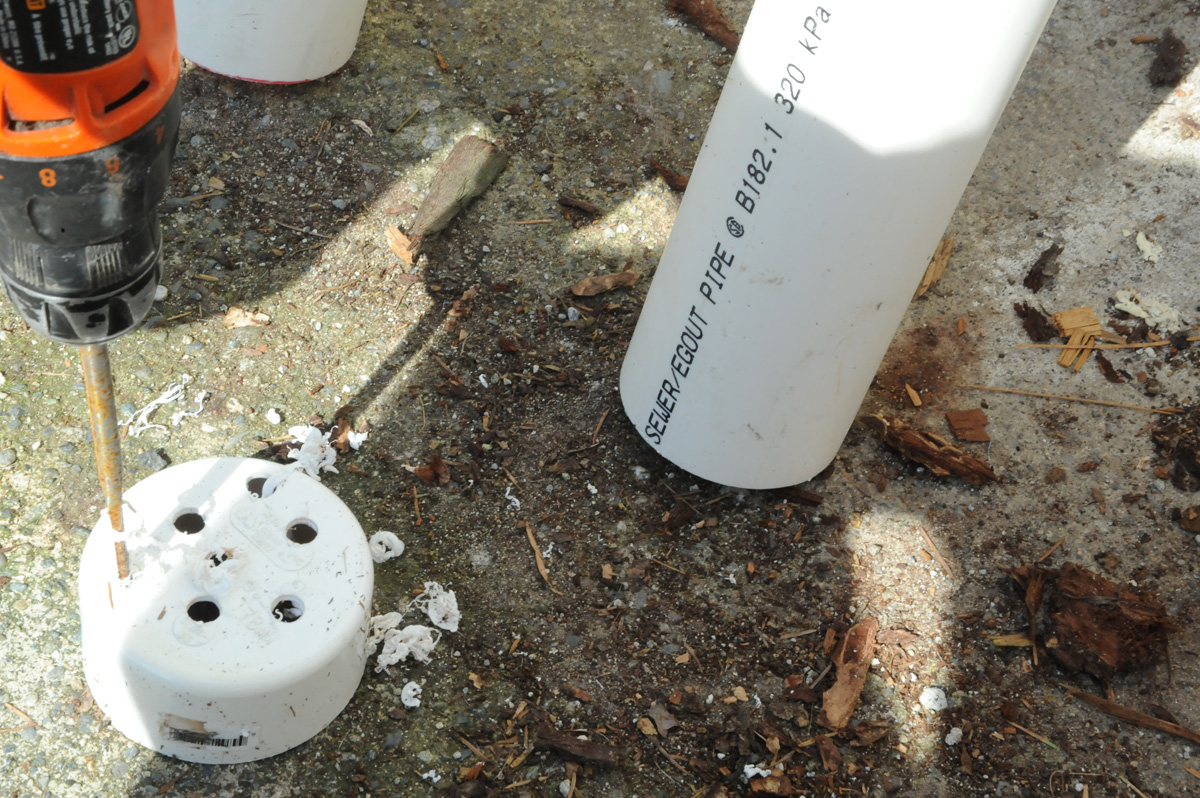
Drill out some 1/2″ or smaller diameter holes in your end caps, one end cap per system. The more open the better, just making sure it will hold in the size of growing medium you are using. Using two or more stainless steel screws, secure the end cap onto the bottom end of your vertical growing tube.

Step Six:
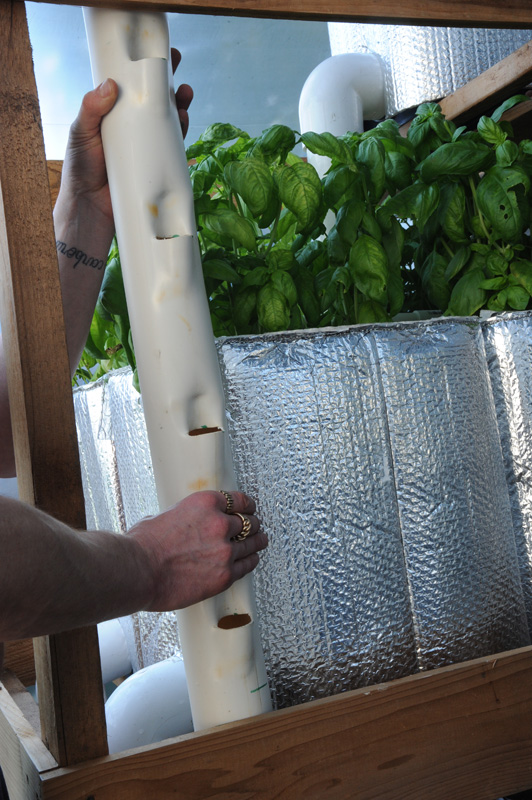
Fill the DIY vertical aquaponics system tubes with your growing media. Since we had an established system which we were converting in part to vertical, we had seasoned (biologically active) growing media to use, so if we wanted, we could plant right away. Otherwise, your system may have to run aquaponics water through it for a month or so before it will work well in growing plants. Using hydroponics methods, sterile media is preferred ,and you can plant right away.

Step Seven:
Attach the vertical grow tubes to your support system, using the attachment locations you marked earlier and have drilled out. This is where you run the carriage bolts through the couplers you created. The head of the bolt should be in the wood or metal framing member, and a washer before the nut on the opposing side of the vertical growing tube you have fabricated. Tighten down using a wrench firmly, but don’t overdo it and crush your coupler.
Step Eight:
Install your watering system to deliver water from the aquaponics tank to each of the growing tubes. We used 3/8″ tubing and connections in a “ring” connecting all of the tubes together. Each of the tubes drains independently, straight back into the aquaponics Tilapia fish tank below in our DIY vertical aquaponics system. Even if we have a link, everything is positioned over top of the tank, and should simply fall back in. A leak that drains your system dry while unattended would spell disaster–this is something to address in basic aquaponics system construction. The system is now ready to grow in, with the aquaponics water or nutrient solution (vertical hydroponics) running constant.
