
Hydroponic 3D Printing
3D printing in Hydroponics, Microgreens and Gardening By Christopher Hansen
Hydroponic 3D printing gives growers an invaluable tool to make, repair or even innovate hydroponic parts or complete growing systems. If you also ever wanted to take your hydroponics and microgreen setup to the next level you have come to the right place. I will show you, how a 3D printer opens new dimensions for you and make
your hydroponic garden as unique as yourself. We will start with easy steps and printing already existing
models, to then go all the way to designing everything yourself.
printed
Start 3D-printing things:
To 3D print anything you need a digital model of the part of your choice. The most common file
type for this is STL. This file is used by most CAD or 3D modeling softwares. To make your model
printable you need another program called a Slicer. This program slices your model into tiny
layers, some as small as 0.05mm, and creates a so called .gcode file. This file then tells the 3D
printer where to move while extruding the filament. If you are familiar with CNC machines, think
of it as a reverse CNC. Instead of removing material we add something in the process. The most
common material for 3D printing is PLA, which is a stiff plastic and in some cases even
biodegradable. Besides this there are numerous materials out there, even flexible ones, that you can
use for hydroponic 3D printing.
Naturally then, the first and easiest step to start 3D printing is grabbing an STL file from the
internet, put it in your slicer and you are ready to go. There are probably millions of different files
for any application you can imagine. The two most common applications are probably: Repairing
and Improving.
Let us start with the rather obvious one repairing: It happened to me more than once, that some
major tool, like a water pump breaks. And sometimes you are even lucky to find the piece that
broke online and it ships within a few days. Unfortunately though, mostly with older pumps and
tools, those pieces are rather hard to come by. And probably you are not the only one with this issue.
Many of those parts can be found as a 3D printable STL file and after a couple of hours your
hydroponics system is ready to go again.
Furthermore I love to improve my setup with 3D prints: And the main reason is it is easy to
customize, even if you have zero experience with complicated CAD or 3D modeling programs. The
rather not so secret trick is: scaling models. You know it, I know it, when you go to the hardware
store there are all thinkable sizes of connectors or sealings, just not the one you need. A millimeter
here, 1/4 of an inch there. With the 3D printer you just scale the model e.g. by 20% in the X
direction and it fits, no questions asked.
Make your own 3D prints:
Speaking of scaling models. Why not start with making your own models right away? True taylor
made design for your gardening setup. And there are many great ways to start. For the deep dive
into designing 3D models I recommend get a CAD program and just start. There are many free, yet
powerful options available. Of course this takes some time to get used to the program and maybe
you just want to make something easily. If you feel overwhelmed by learning how to use a whole
new program, maybe check out Tinkercad. It is easy and fun to use where you can build things via
drag and drop.
How I started to make my own 3D prints
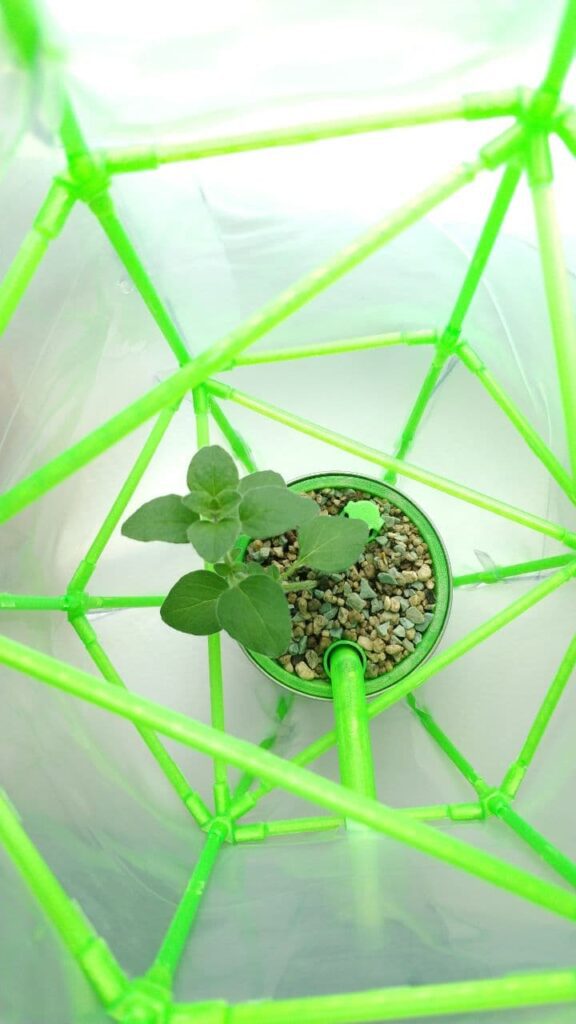
left is up, so the plant is watered properly. The hole on the right is for watering.
I am a big fan of tiny indoor gardens. It just fascinates me to make plants grow without soil on my
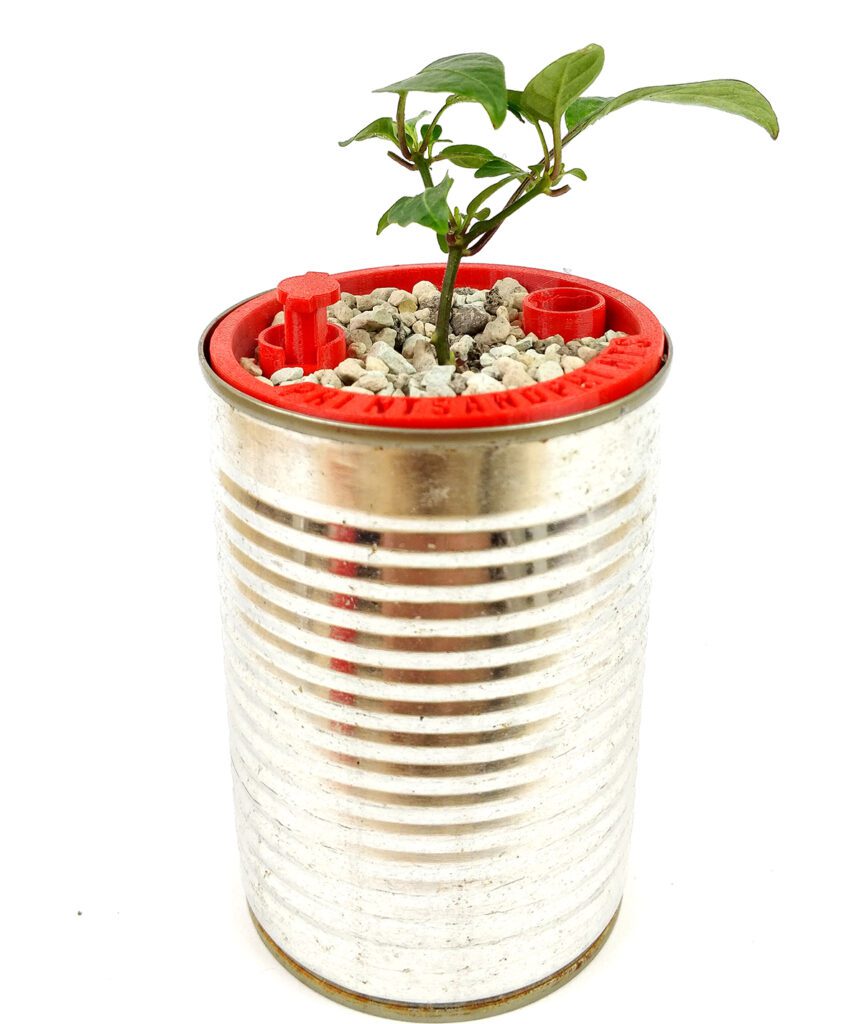
window sill in whichever planter you find. And since I am also a big fan of canned tomatoes I had a
few old tin cans lying around. I think you can connect the dots here: I started my CAD program,
measured the tin cans and came up with a tin can hydroponics system. The first design was very
basic and just a proof of concept. Later then I even included a water level indicator, that is print in
place. Print in place is a big advantage of 3D printing, as it means you design the print in a way, that
it is ready to use, once you remove it from the build plate. It means no connectors, no assembly,
nothing it is just printed into the hydroponics cup and ready to use.
ready to use after the print is finished.
Another project where hydroponic 3D printing came in handy for me was microgreens. I live in a flat and
unfortunately there is not enough space for a proper microgreens setup. Hence I had to find a way
to grow microgreens that includes less space than the common grow boxes.
Ideally I wanted something small I could use to grow them on the window sill. And it was somehow hard to find
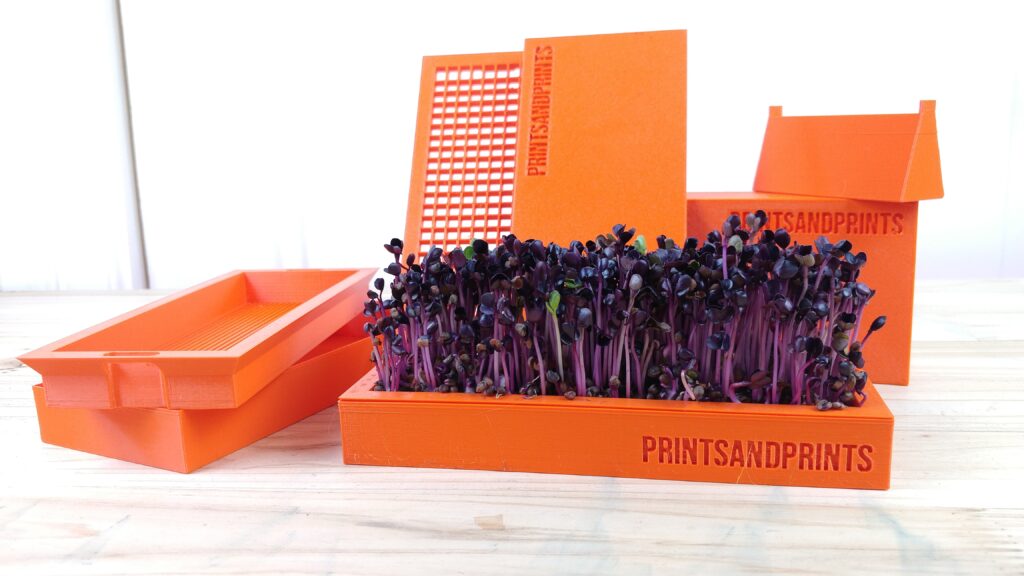
anything that fit my needs. Hence I designed a small 3D printable microgreens kit. It contains
everything the professional microgreen grower needs: A bottom tray for the water and a tray for the
substrate and seeds. This is then covered with a popping pressure plate that pushes the seeds down
while germinating as well as a cover box to keep them dark for a bit longer.
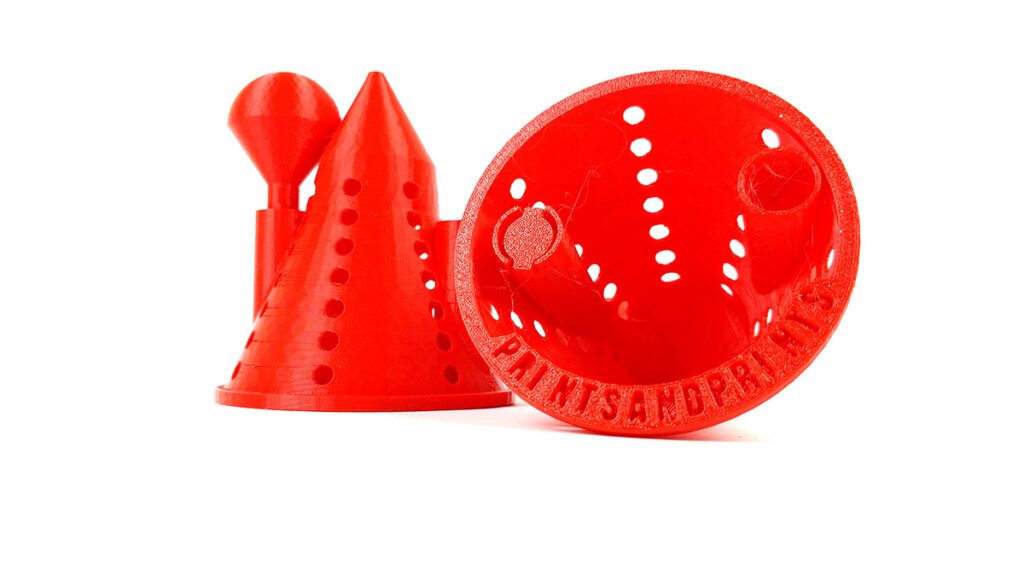
Since sowing is not as easy in the smaller dimensions I even added a little something for that: A funnel and a sowing mesh.
This allows you to grow small batches of microgreens for prototyping, if you are usually growing
larger quantities, or for me to harvest the perfect amount for a two person dish, while growing on
my window sill just as I wanted it.
harvest
Furthermore with a 3D printer and an STL file you can make as many as you want and you skip all
of the shipping cost.
Hydroponic 3D Printing, Conclusion:
Let us wrap up everything in three key points:
• 3D printing is great to customize and improve your garden and hydroponics system. The
possibilities are endless and maybe you even come up with a unique idea for a new system.
• There are easy ways to get into hydroponic 3D printing, while not holding you back to take a deep dive
into the topic. While it may look scary in the beginning there are many great resources and
an open community that helps each other a lot.
• Once you have a 3D printer it is hard to imagine how you could live without one. Mine is
running almost everyday and I try to come up with even more ideas to make everyday items
a hydroponics home for my plants.
The STL files for all prints in this article can be found here:
https://www.etsy.com/shop/PrintsAndPrintsDE
To see how all of this works in a video, check out my Youtube Channel:
https://www.youtube.com/c/PrintsAndPrints
About the Author:
My name is Christopher and about two years ago I got into 3D printing. I was curious about the
technology and how it would help me improve my everyday life. I was always growing my kitchen
herbs indoors and as I had the printer I was basically only thinking about how I could improve tiny
indoor hydroponics and gardening systems. In my opinion 3D printing is the future of home
production and maybe even the 4th industrial revolution. If you want to get in touch with me just
send me an E-Mail: info@printsandprints.de .