Growing Wheatgrass, Easy Steps for Success.
Growing Healthy Wheatgrass at Home
Growing wheatgrass is an easy way to grow some of your own nutrition at home. Growing wheatgrass for juicing or eating raw (for example chopped and sprinkled on some soup) doesn’t cost a lot of money, take up much space or use a lot of electricity compared to growing other types of crops indoors at home.
[quote]From start to finish, you can be reaping the rewards of growing wheatgrass in as little as 10-14 days following our method.[/quote]
According to Wikipedia, Wheatgrass is widely recognized as “a source of potassium, dietary fiber, vitamin A, vitamin C, vitamin E (alpha tocopherol), vitamin K, thiamin, riboflavin, niacin, vitamin B6, pantothenic acid, iron, zinc, copper, manganese, and selenium. Wheatgrass is also a source of protein (less than one gram per 28 grams).“
Besides the mineral aspects that growing wheatgrass yields, there are lots of other healthy substances like enzymes, saccharides and other co-factors that may lend a boost to your health, vitality and well being. When grown at home and harvested fresh the taste of wheatgrass is actually quite amazing, contrary to what you may think—deliciously sweet with very little “green” taste when following the method we outline below.
In short, incorporating some wheatgrass into your diet is going to help your health—and besides, it’s a really rewarding feeling when your grow it yourself at home. Growing wheatgrass is a great family project too—even pets can benefit from having some fresh wheatgrass in their diet.
From start to finish, you can be reaping the rewards of growing wheatgrass in as little as 10-14 days following our method.
Here’s a short list of stuff you will want to have to grow your own wheatgrass at home:
-organic wheat seed (Hard Red Spring Berries are most common)*
-10” X 20” plastic nursery flats (no holes in bottom; re-usuable, btw)
-12 cell inserts for nursery trays (can be plastic or fibre)
-pint or quart sized mason jars with lid collar (one per tray)
-kitchen scale (nice to have, but optional)
-soilless mix (coco, peat, etc) or sterilized potting soil
-earth worm castings (optional)
-filtered water
-warm spot with some sunlight or a small flourescent light or LED light strip
-piece of cheese cloth or window screen
*”Wheat Berries” is another name for wheat (triticum aestivum) seed, and you don’t need to buy anything fancy or expensive—we get our seed as organic red spring wheat from the bulk bins at the Health Food store—yup, it sprouts!
Growing Wheatgrass, Step By Step
Sprouting (around 2 to 3 days)
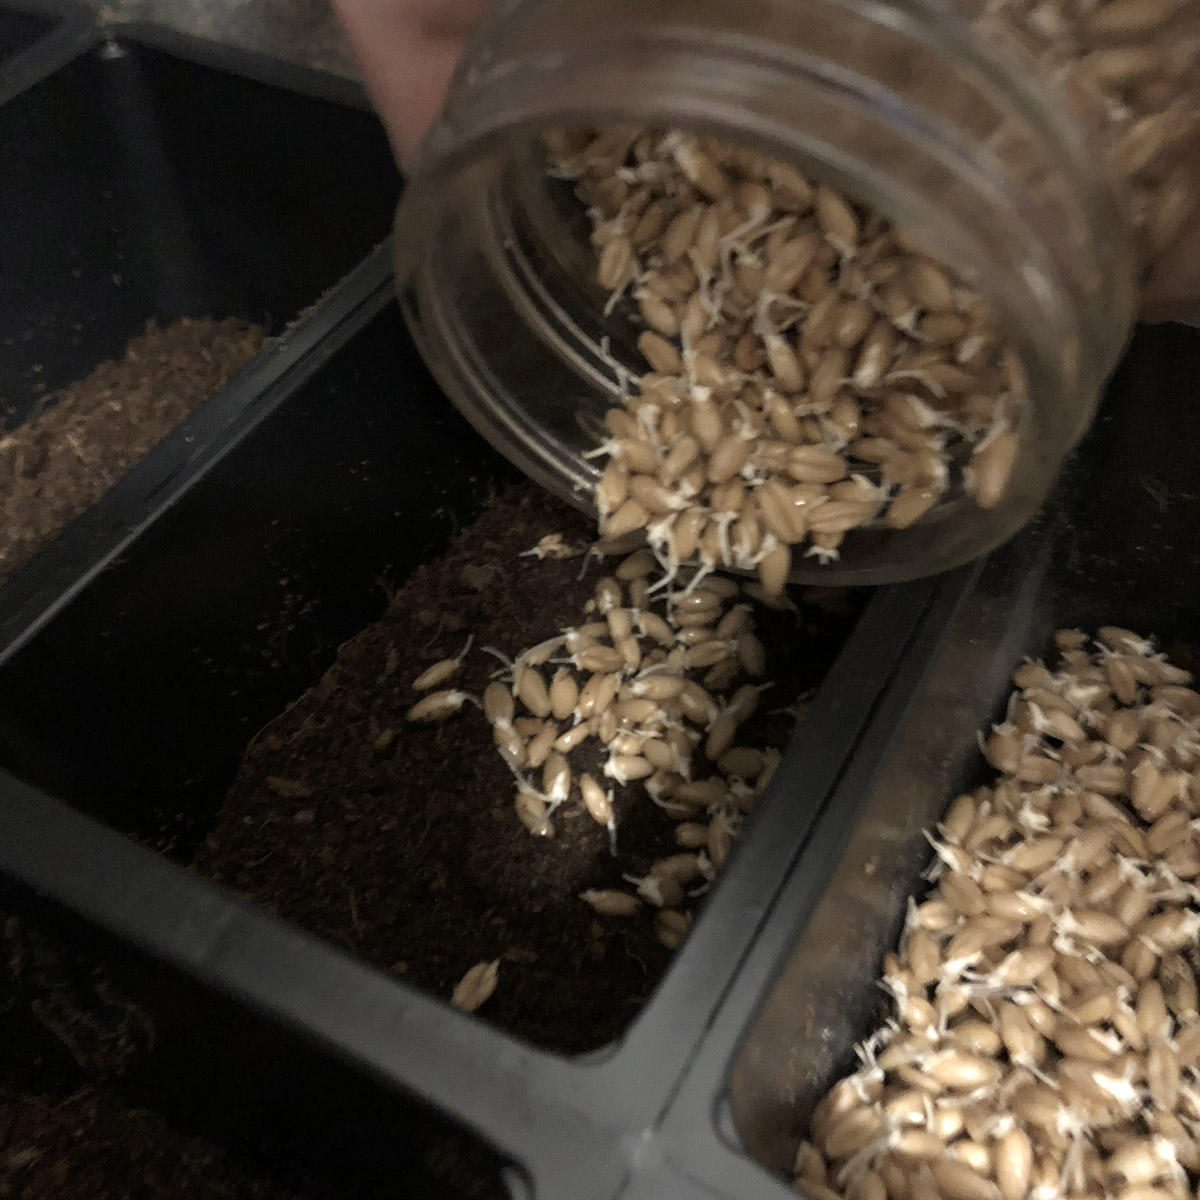
In our experience, it takes about half a pound (approx 225 grams) of wheatgrass berries to fill and harvest one 10” X 20” nursery flat with 12 insert cells. So for each tray, you’ll want one pint or quart sized mason jar and half a pound of the Hard Red Spring Wheat Berries. If you don’t have a scale, it’s about 1/3 to 1/2 way full in a pint sized standard mason jar.

After adding berries to the jar, fill with filtered water. Use the ring/collar of the mason jar to secure the piece of cheese cloth or window screen as a breathable lid and drain screen. After about 12 hours, turn the jar upside down over the sink to drain all of the water out, and fill again with filtered water.
Perform the soak and leave the jar(s) somewhere warm, like above the fridge. Cooler will work too, but it may take longer.
After doing the 12 hour soak and drain twice, the next time you drain the jar after filling do not add more water. By now, you will notice that the wheatgrass seed has expanded significantly (that’s why the quart size jar is a little easier to work with). DO NOT LET THE WHEAT BERRIES DRY OUT.
At least once a day (twice worked best for us) soak the seeds with fresh filtered water and drain fully.
After 2 or 3 days you should see lots of little white sprouts starting to poke out from the seeds—congratulations, the sprouting phase in growing wheatgrass is completed and you can move onto the next step.

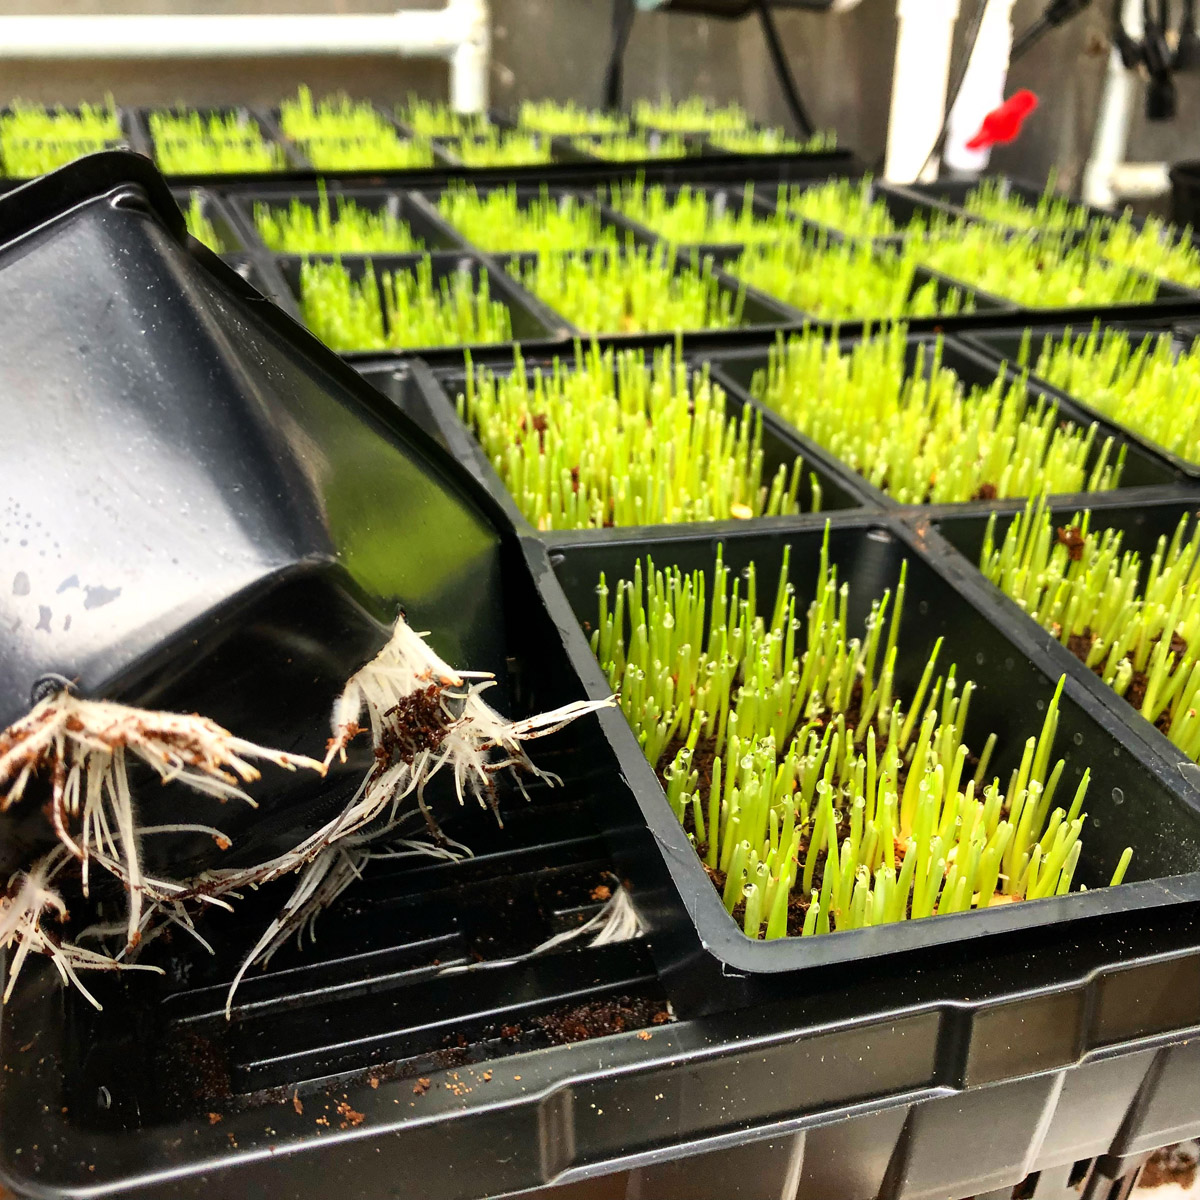
Planting Sprouted Wheatgrass (around 10-15 minutes per tray)
To prepare your trays, rinse plastics with a little bleach and water if you are reusing them from previous gardening. Rinse again with fresh water.
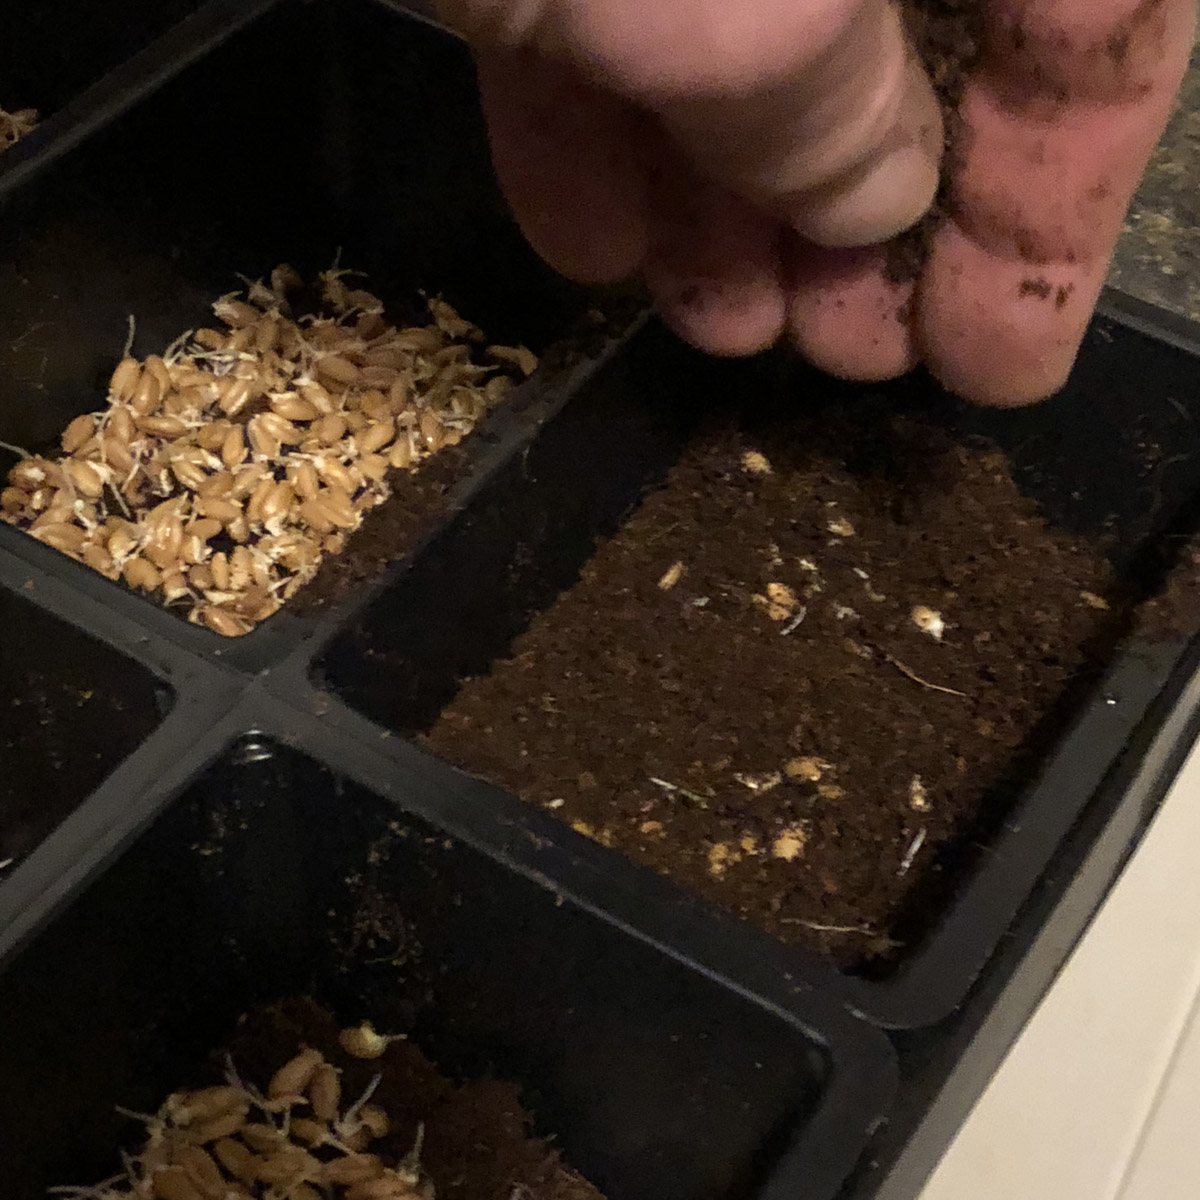
Add about half an inch of pre moistened (moist not wet) soilless growing media or sterilized potting soil to the bottoms of the cells in the tray. We like soilless because it’s sterile and hygienic, drains freely and won’t stay water logged or heavy—adding a small pinch of earth worm castings to each cell in the soilless tray is a simple and effective way to add some organic nutrients for growth.

Sprinkle the sprouted wheat berries from the jar in an even layer on the half inch of soil or soilless mix on the bottom, evenly distributing the contents of the jar over the twelve cell inserts.
TIP: Try not to use your fingers, the emerging sprouts are delicate. Just shake the jar instead.
Sprinkle a small amounts of soil or soilless mix on top, you don’t have to bury the seeds, just help keep them moist.
Growing Wheatgrass Trays
Once planted, ie seeded and lightly covered with soil or soilless mix. Gently water or better yet mist the the cell inserts until you see just a little bit of run-off pool in your nursery tray. DO NOT OVERWATER OR ALLOW TO SIT IN STANDING WATER.
Growing wheatgrass doesn’t require strong light, so a sunny window is just fine—a fluorescent or LED light strip works good too. If you are growing 4+ flats at a time consider an energy saving yet very bright and robust 150 watt CMH grow light—you can use it for growing all kinds of other plants too, even veggies, greens, flowers and herbs; it’s a scaled down commercial grow light, essentially.
Temperature will play a strong role in how quickly your wheatgrass grows. Growing wheatgrass at room temperature works great, although it will grow and tolerate slightly cooler temperatures.
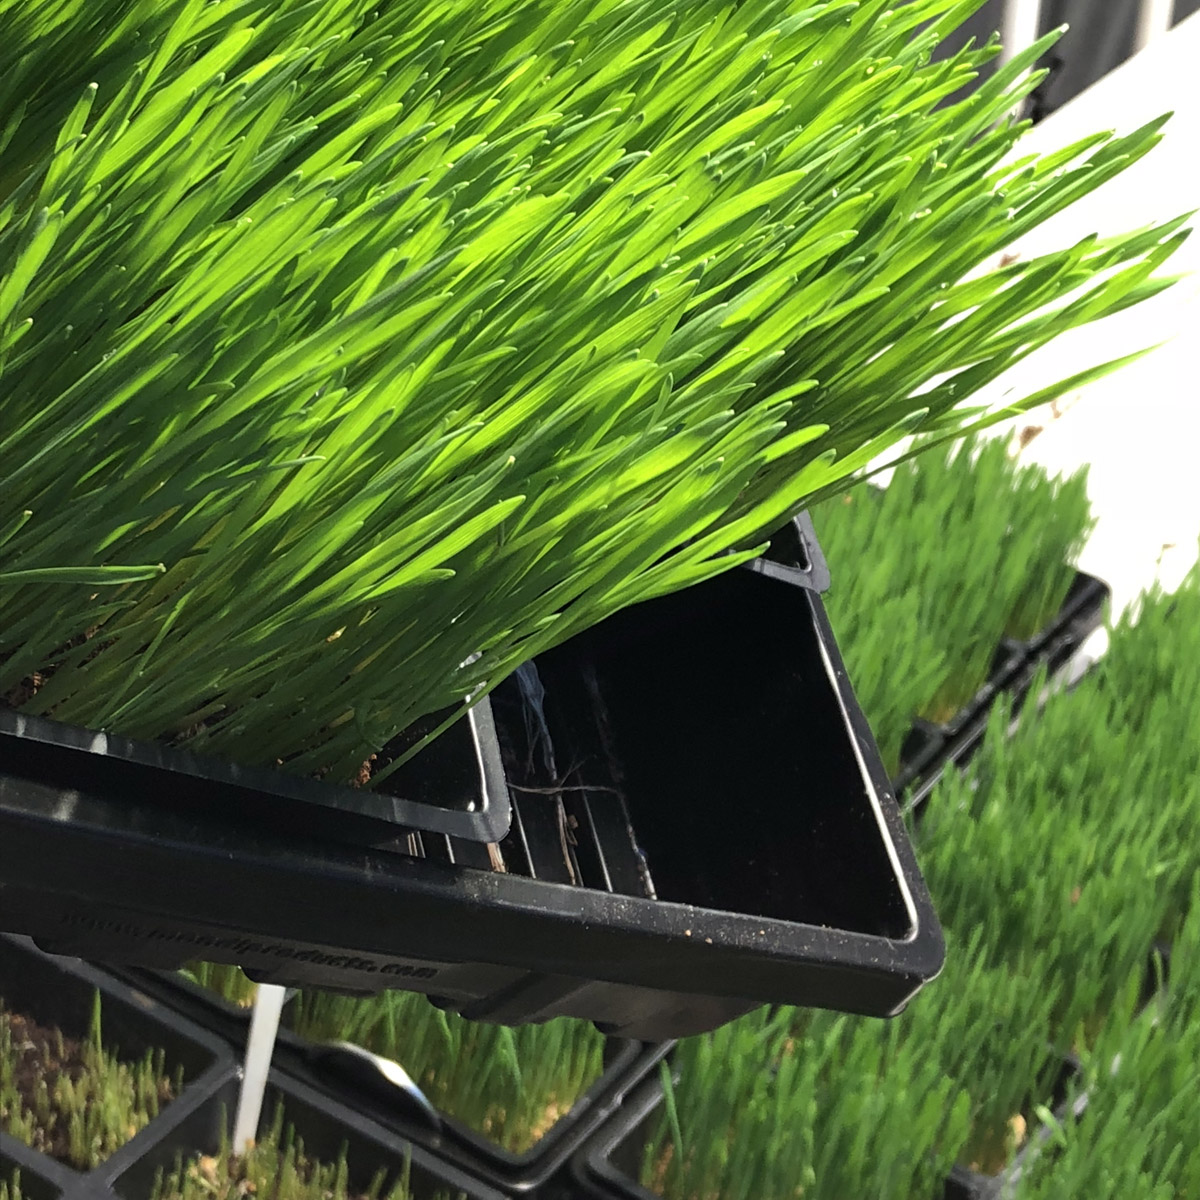
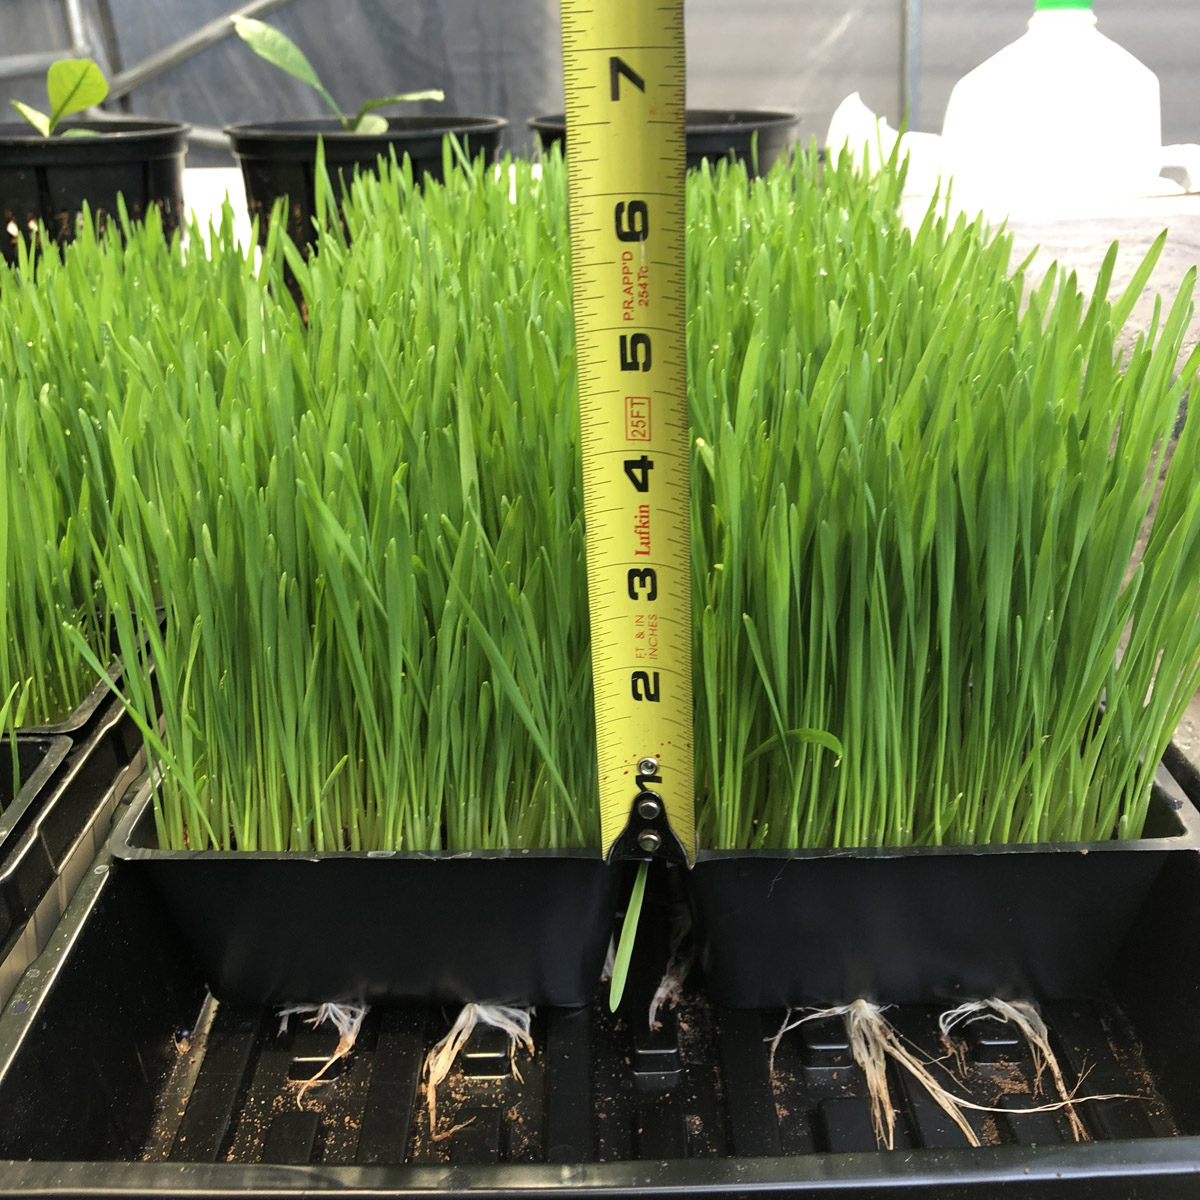
Within a day or two you should see some green stubble forming, and within seven days you should have a nice carpet of five to seven inch tall wheatgrass, ready for eating.
You may need to lightly water occasionally; check the flats every couple of days. Knowing how heavy the flat is from wet to dry is a great way to tell—just lift it up and gauge the weight Again, it’s important to make sure the roots do not sit in standing water. Always use filtered water—or rain water if you don’t have a good quality water filter at home. Clean water not only grows wheatgrass better—it serves to improve the taste, ie a sweet and clean taste.

Harvesting & Enjoying the Benefits of Wheatgrass
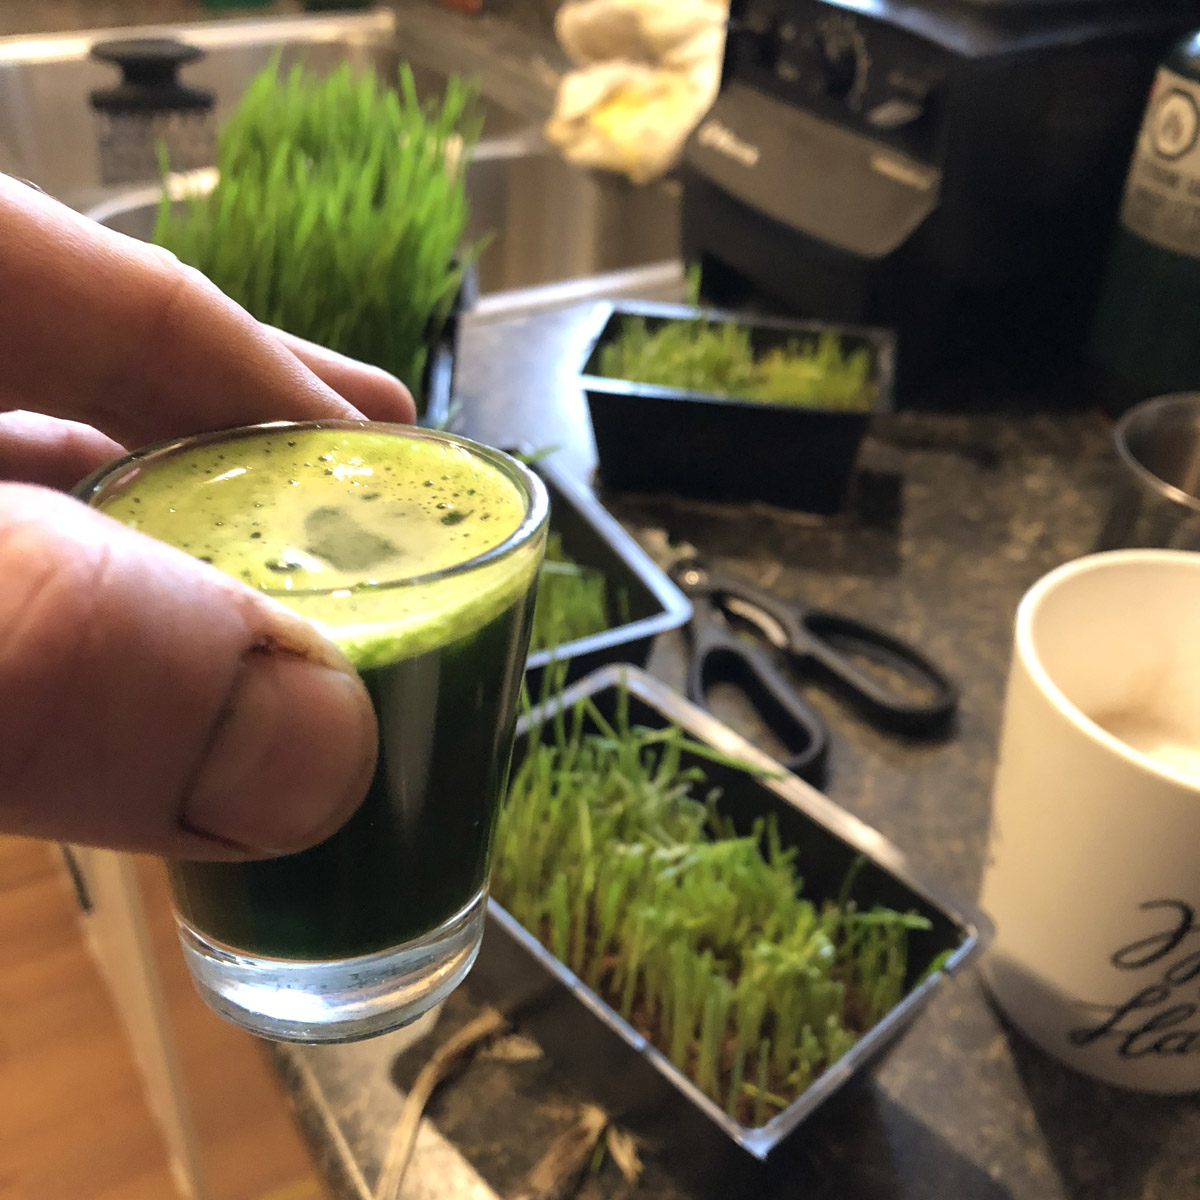
When growing wheatgrass at home, harvesting should be done right before you eat it. Using a clean pair of scissors or a sharp knife (careful) just hold the wheat grass at the top with one hand and cut about half an inch up from the base. Note, it can grow back to be harvested again.
You can finely chop the wheatgrass and sprinkle fresh on soups just before eating and it’s also great in smoothies.
Juicing wheatgrass is very popular. Rotary style juicers are most common (we picked up a high quality one from a thrift store for ten dollars) but they do not do the best job of converting your wheatgrass to juice. About three cells worth from the tray with an added jigger of fresh filtered water yields a very tasty and lively full shot of homegrown wheatgrass juice with one of these common juicers.
Manual screw-type juicers are very popular along with a variety of electric types. There’s a huge range of juicers out there, just be sure to look for ones intended for wheatgrass because it’s different than trying to juice solid fruits like apples, oranges, carrots, beets, etc.
Bottom’s Up! Here’s to your health.