Building Sealed Grow Rooms Part Three
Grow Lighting & Environment Equipment, What You NEED to Know.
Finally, we have arrived at Part Three of Building Sealed Grow Rooms.
In Part ONE of Building Sealed Grow Rooms we talked about the basics, like what makes a sealed grow room different from a traditional indoor garden set up—along with a break down of some of the types of costs that would be involved.
In Part TWO of Building Sealed Grow Rooms, we looked at construction details like building materials, wiring, plumbing, etc with plenty of discussion on efficiency and safety for years of trouble free use.
Finally, we are going to want to equip our grow room with all the stuff that makes a well built room into a functioning, reliable and efficient grow room that can produce crops constantly year round—completely independent of outside environmental conditions. This of course means grow light systems, ventilation, cooling, humidification/de-humidification and related controls.
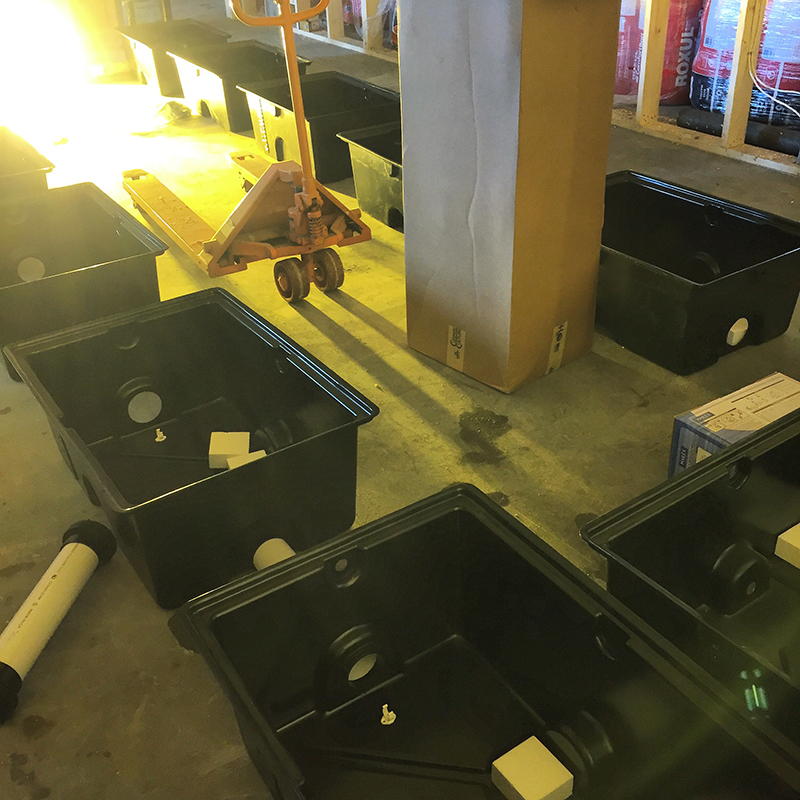
Above: A larger scale sealed grow room under construction using Current Culture hydroponic systems
TIP: take if from experienced growers—have your budget sorted BEFORE you start investing in high cost grow equipment. If you blow your wad on the latest and greatest lighting systems, are you going to have enough for that expensive (and very necessary) Air Conditioning System? Don’t underestimate what it will cost to bring it all together and functioning smoothly. If you start growing before the room is finished and run out of funds it could turn out to be a very expensive and unproductive lesson for you. That old adage: People don’t plan to fail, they fail to plan.
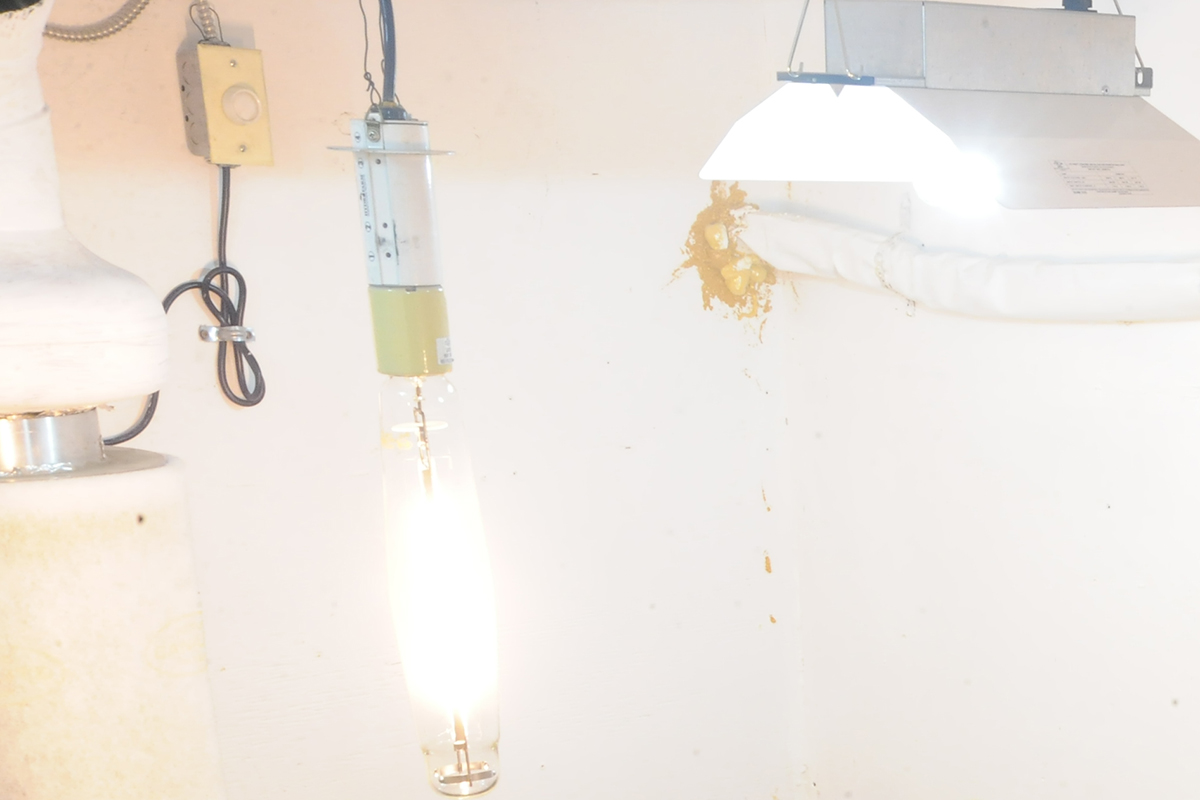
Above: Hobby Size Sealed Grow Room using HPS & LEC lighting together
The most popular choices presently available when it comes to grow lights for a sealed grow room are HID (High Intensity Discharge) and LED (Light Emitting Diodes). Within each of these two main categories are quite a number of sub-categories, for example with HID lighting there is HPS (High Pressure Sodium), MH (Metal Halide), LEC (Light Emitting Ceramic) and more. From there, there are even sub categories, and one we will discuss first is DE (Double Ended) HPS.
[youtube width=”560″ height=”315″ video_id=”yIH4yXvjTCI”]
DE HPS
One of the most widely adopted choices presently available, although not recommended unless you have tall ceilings or don’t mind running the systems at the lower output settings if you don’t (but why pay for a 1000 watt lighting system when you only used 600 watts of it).
Double Ended HPS systems throw lots of light and are capable of producing large yields when all that light—and the large levels of heat the lighting system generates are managed properly.
TIP: when operating at 1000 watts of output, DE lighting systems will need at least three to four feet of vertical clearance from the tops of the plants. Keep in mind height of containers or beds, necessary space between fixture and ceiling—make sure you won’t run out of height, or you will bake or bleach your plants with the intense light and heat.
Typically, you can get a solid five foot by five foot lighting foot print under a 1kW DE HPS lighting system that will produce heavy and firm flowers or fruits—for leafy growth it may be overkill.

Above: Revolution Micro’s RLC-1 Control adds smart functions to DEva & Phantom DE HPS grow lights
LEC (Ceramic Metal Halide)
At present the 315 watt lamp types are most widely available and reliable. Some fixtures will lump two of these lamps into a single fixture, and refer to it as a 630 watt system. Larger wattages are beginning to emerge from testing phases too.
We find these to be very efficient lighting systems, watt for watt, although if you can manage the heat and don’t mind bigger power bills, you will likely get a heavier yield in the same sized area using a higher wattage DE HPS lighting.
LEC grow lighting will produce flower and fruits of exceptionally high quality, although the type of growth tends to be leafier and produces flowers that are slightly less dense. LECs are especially great for growing culinary herbs with increased essential oil contents versus HPS lighting.
If using a 315 watt Ceramic Halide lighting system, realistic coverage is going to be around Three Feet by Three Feet in our experience for high light level loving plants—opinions vary, but that has been our experience with several years of testing.
LED (Light Emitting Diodes)
Often, this is where a higher level of capital investment is required for the initial purchase, although the pay back comes within a year or two for lower power usage, less frequent lamp or driver replacement (versus HPS or LEC) and potentially improved crop qualities.
Opting for high quality LEDs can also mean a significant reduction in cooling equipment expenses, both to purchase and operate due to the cool running nature of LED fixtures and that much lower wattages are required to achieve efficient crop lighting levels in the same sized sealed grow room.
Sizing up LEDs for a growth lighting coverage foot print in your grow room is not standardized like it can be with HPS or LEC—make sure your LED supplier stands by what they sell and will provide you with the information you need to set up an LED lighting system for your exact specifications. They may also make suggestions as to how many BTUs (cooling power rating) are recommended per fixture.
Sizing Up a Cooling System
Typically, aiming for around 4000 BTUs of cooling power for every 1kW (1000 watts) of growth lighting used is a good rule of thumb to work with. Things like room insulation, internal volumes of air, size of gas-fired CO2 generator will also factor in.
So, if you have FOUR 1000 watt grow light fixtures, that’s around 16,000 BTUs of cooling power needed—-sounds simple enough, right?
Sadly (and expensively), not always the case!
Important, READ THIS:
If you have your cooling system supplied and installed by professionals, our rule of thumb tends to work very well. However, if selecting one of the many widely available DIY options, such as a Mini-Split Air Conditioner/Heat Pump it can be a little more frustrating.
In our experience, the “rated” cooling output on the DIY models (they come with pre-charged refrigerant lines, just connect and the system is ready to use) don’t perform close to their rated outputs printed on the box—be careful not to make this mistake. Sometimes they only provide about HALF the cooling power stated on the box, comparing a more industrial piece of cooling equipment with a similar BTU rating in the exact same grow room (we tried this, it’s true).
After a little research, turns out that the rating on the box of a DIY Mini-Split AC is often more about what it’s capable of, rather than what it will actually do for you out of the box as a DIY set-up (not so cool). That means, they are supplying a system that isn’t as strongly charged with refrigerant gas as it could be. Depending on local laws and availability, you can usually top up the charge yourself—although not without some additional investment in special tools and time to learn how.
If buying a DIY Mini-Split from a reputable hydroponic supplier, make sure to ask how many 1000 watt lights their system can actually cool, rather than what the box is promising.
Carbon Dioxide (CO2) Enrichment
As you should know if operating with this level of investment at stake, your plants will need a supply of Carbon Dioxide (CO2) when growing in a sealed environment with no regular exchanges of outside air. Otherwise, they will run out of CO2 very quickly and growth will stop or slow to a crawl. CO2 is probably the easiest way to get around 25% more yield from your indoor or greenhouse garden while eliminating a week or two from the cropping calendar because plants grow faster and healthier in a CO2 enriched grow room.
Typically, an average of 1200 PPMs of CO2 used from Early Flowering to the beginning of the Late Ripening Phase will improve cropping results dramatically in a well managed sealed grow room
There are a few sources of CO2 enrichment commonly used by growers that can be effective when building sealed grow rooms:
Biological:
Fermentation, decomposing organic matter, fungi, etc are available as kits from your brick and mortar or online hydroponics supplier. In a well sealed room, ie all cracks have been caulked with natural silicone and the door is tight fitting, these kits can actually work reasonably well.
However, these kits need to be replaced and recharged with some regular frequency—that might be fine in smaller rooms, although the cost and time required in replacement could become prohibitive for larger scale production.
CO2 Gas Cylinders:
When building sealed grow rooms you should not plan to use welding grade CO2 gas, it’s going to need to be Food Grade, like the type they use for beer making or carbonating beverages. Often, local hydroponics shops wilful sell you a tank, then you just bring it back and swap it for a refill charge every time you need to replace the tank.
These can run out quickly, and are not inexpensive to replace while also being cumbersome and missile-like. If you plan on using bottled CO2, which IS safe, clean and effective, you will absolutely want to ensure the room is tightly sealed—and it is best to avoid using air cooled lamp reflector systems, unless you are very diligent in sealing any and all cracks in the ductwork and reflector housings. Otherwise, it’s literally sucking money out of your wallet with the additional and expensive CO2 tank replacement.
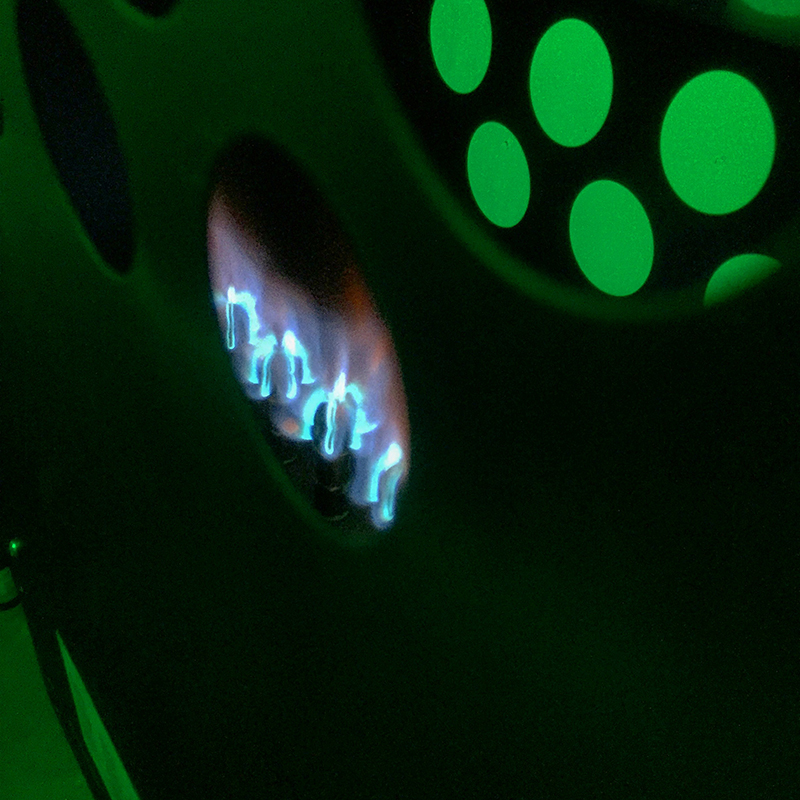
Gas Fired CO2 Generators:
Serious CO2 equipment. The by-product of clean and efficient combustion of Propane (LP) or Natural Gas is heat, water vapour and carbon dioxide, with trace amounts of other gases. In building sealed grow rooms, you want to build the rooms as tight as possible for high efficiency. However, clean combustion requires a small source of fresh air—so passive fresh air duct or opening may be required to trickle a little fresh air to your gas fired CO2 Generator.
A BBQ type propane tank can last weeks if use the room has been build efficiently. Naturally, larger rooms will require more frequent replacement—although at significantly less time and expense per cropping cycle versus Biological or Cylinder sources of CO2 gas for growing.
With Gas Fired CO2 ALWAYS FOLLOW THE MANUFACTURERS INSTALLATION & OPERATION INSTRUCTIONS TO THE LETTER—IF YOU ARE UNSURE OF SOMETHING, CONTACT THEM AND ASK.
A good CO2 generator is not inexpensive, check with your supplier to see what’s reliable and to ensure that they will stand behind the product and service it if necessary–one of those things you should NEVER work on yourself for regular maintenance or repair without proper training.
CO2 Monitoring & Control
With biological sources, it’s good to know how well it’s working and when to replace—so a CO2 monitor is still a good idea. With Cylinders and Generators it should be considered necessary equipment.
If your supplemental CO2 system hasn’t been carefully designed or sized up by a professional or supplier, “Fuzzy Logic” type systems are a good idea. They help prevent your CO2 equipment from frequently overshooting the mark, ie your target CO2 set point for that phase of growth. Otherwise, your CO2 will be dispersed for longer than necessary by the time your electronic CO2 “sniffer” figures out what’s going on—fuzzy logic “watches” the patterns and makes adjustments.
CO2 monitors and controls typically use an infra-red beam (or two) to measure the density of CO2 in the air around the sensor. When this falls below a point set by the grower, the controller is activated, turning g on the CO2 distribution system (cylinder or generator; biological will do it’s own thing)
| MORE ABOUT CARBON DIOXIDE ENRICHMENT |
Grow Room Air Circulation & Purification
In building sealed grow rooms, you will want to install activated carbon scrubbers to run constant. Simply, secure the right sized inline fan to suck through an activated carbon filter intended for growing (ie Can Filter) and keep it recirculating the air in the grow room. The activated carbon will trap and hod any impurities from the air while keeping strong doors from building up or escaping your sealed grow room. Some larger scale sealed grow rooms may also use UV or Ozone to help keep the air clean, fresh and free of problems. However, these can harm your plants (or even You) if not used correctly or in the event of a serious malfunction.
A good quality oscillating fan usually lasts around one year (the oscillating part is what fails), and does a good job of keeping the air, in building sealed grow rooms, moving freely through the plant canopy to encourage water and mineral uptake and to replenish CO2 levels right around the plants’ leaves. Fans are important to p[event the air from stratifying in the grow room.
For larger installations more industrial HAF (horizontal air flow) circulation fans are often a better choice versus residential type air circulation fans in building sealed grow rooms.
Humidification & DeHumidification
Controlling the humidity in a sealed grow room is more intensive versus traditional IN/OUT style ventilation set ups. In a sealed grow room when plants are small, the Air Conditioning which runs a lot while the lights are on will dry the air very fast and stunt growth severely. Raising humidity to 45-65% isn’t that easy when your AC is running lots—common humidifiers rarely can keep up. The more industrial type humidifiers are recommended—and they can be plumbed to a fresh water supply so you don’t need to manually refill them with great frequency.
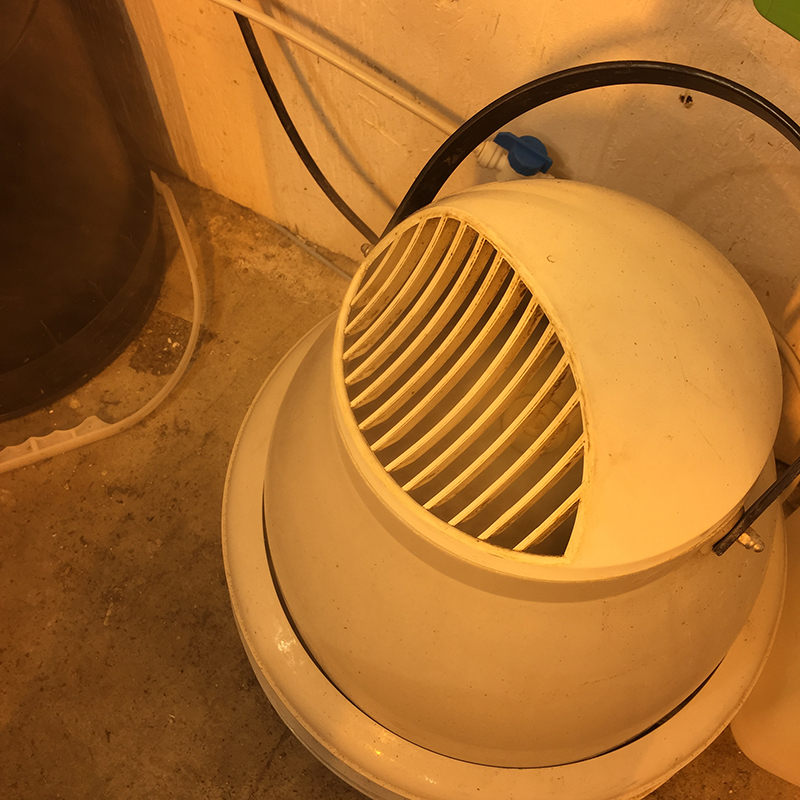
Above: This type of humidifier is a vital piece of equipment during early cropping in a sealed grow room
As the crop begins to fill the room and when the lights go out and the AC cycles less frequently, the humidity can rise very quickly in a sealed grow room. Make sure you have sized up your DeHumidifier correctly.
| MORE ABOUT GROWING ENVIRONMENT HUMIDITY |
TIP: the water captured from your AC and DeHumidification equipment must be drained away, ie condensate return lines. This stuff is pure gold for your grow, ie pure and living water. Ideal for use in supplying your humidification equipment with mineral free water to prevent scaling and mineral deposits. Potentially, condensate return water can also be reused for irrigation purposes.